

Manhole vacuum testing is a straightforward, non-destructive way to check if a new or recently repaired sewer manhole is watertight. Think of it as creating a vacuum inside the structure to mimic the external pressure of groundwater. This negative pressure will pull air through any weak points, revealing tiny leaks before the manhole ever goes into service.
Getting this right from the start is absolutely critical for the long-term health of our infrastructure and helps avoid massively expensive repairs down the road. For operators in the hydrovac industry, mastering this process isn't just a compliance task—it's a core competency that ensures the integrity of municipal assets.
Why Vacuum Testing Is Critical for Modern Infrastructure

Keeping our sewer systems in top shape is about more than just ticking a compliance box. It’s about protecting huge municipal investments and, by extension, public health. For a long time, the go-to method was hydrostatic testing—filling a manhole with water and watching to see if the level drops. It sounds simple, but this approach often misses the small, nagging leaks that grow into major headaches over the years.
Groundwater infiltration is a slow, silent killer for sewer systems. Even a hairline crack or a poorly sealed joint can let groundwater seep in. This extra water jacks up the volume that treatment plants have to handle, ballooning operational costs and putting a huge strain on facilities. Worse, infiltration can wash away the soil supporting the manhole itself, which can lead to structural failure and even sinkholes.
The Decisive Advantage Over Older Methods
This is where manhole vacuum testing really shines. It's sensitive enough to detect leaks that are completely invisible to the naked eye, pinpointing holes as small as 0.2mm in diameter. That’s a level of precision that older water-based tests just can't match.
It’s no surprise that the industry is moving in this direction. The global market for manhole inspection equipment, valued at USD 1.2 billion in 2023, is expected to more than double to USD 2.5 billion by 2032. This explosive growth shows a clear shift toward smarter, more reliable testing methods.
Catching and fixing tiny flaws during the installation or repair phase prevents decades of damage from piling up. This is modern asset management in a nutshell. It’s the essential difference between proactive and reactive work, underscoring the value of preventive versus corrective maintenance.
Manhole Testing Methods at a Glance
For those on the ground, seeing the difference in black and white makes the choice clear. Vacuum testing isn't just a new technique; it's a fundamental improvement in how we ensure infrastructure integrity.
| Feature | Vacuum Testing | Hydrostatic Testing | Visual Inspection |
|---|---|---|---|
| Precision | Detects micro-leaks (down to 0.2mm) | Misses small or slow leaks | Only finds obvious, visible defects |
| Speed | Fast; typically under 30 minutes | Slow; can take several hours | Quick, but superficial |
| Water Usage | None | Requires thousands of gallons | None |
| Accuracy | High; provides quantifiable results | Inconsistent; results can be subjective | Low; highly dependent on inspector skill |
| Safety | Safer; no risk of structural overload | Risk of washout or structural stress | Limited to surface-level assessment |
This comparison highlights why vacuum testing has become the gold standard. It delivers reliable, data-driven results that give asset managers real confidence in their systems.
Setting the Stage for an Accurate Test
Of course, a vacuum test is only as reliable as the prep work that comes before it. You simply can't get a perfect seal if the manhole surfaces are caked with dirt or if the exterior joints are still buried in mud and debris. This is where hydrovac operators and utility crews need to be on their A-game.
The core principle is simple: you can't test what you can't see or properly seal. Infiltration often occurs at pipe penetrations or barrel joints, which may be buried. Failing to expose and clean these critical areas is a leading cause of inaccurate test results and costly rework.
This challenge makes precise, non-destructive digging a non-negotiable part of the process. For crews in the field, prepping a site efficiently without damaging the structure is everything. The Hydrovac Attachment Tool was engineered for exactly this scenario. It leverages the hydrovac's power, combining high-pressure water with strong suction, allowing operators to carefully excavate soil from around the manhole.
This controlled digging method exposes every joint and surface for a thorough cleaning and inspection. It guarantees that when the sealing bladder is inflated, it creates an airtight lock against a pristine surface, making the vacuum test reliable and conclusive from the get-go.
Preparing the Manhole for a Flawless Test
You can't get an accurate vacuum test result if you don't nail the prep work first. In my experience, almost every false failure—the kind that wastes hours and costs money—comes down to a rushed or sloppy setup. Before you even think about pulling a vacuum, the goal is simple: get every surface the test head will touch perfectly clean and accessible.
This process really begins the moment you arrive on site. You need to establish a safe work zone, which means setting up proper traffic control with cones, signs, and flaggers, especially when you're working on a busy street. Safety isn't just a box to check; it’s the bedrock of a smooth, professional job.
Initial Inspection and Debris Removal
Once the area is secure, pop the lid and take a good look inside. You're looking for obvious problems like built-up sediment, trash, or standing water. A quick clean-out with basic tools can handle the easy stuff, but the real challenge is often buried.
The most critical leak points—the barrel joints and pipe connections—are frequently covered by compacted dirt, roots, or old backfill. You absolutely have to expose these areas. If you only clean what you can see from the top, you're not getting a true picture of the manhole's integrity. Water doesn't just leak from the inside out; it infiltrates from the outside in.
This is where you can get into trouble with traditional digging. A shovel or a mini-excavator can easily damage the very structure you're trying to test, creating a new leak right before your eyes. You need surgical precision, which is why hydro excavation has become the go-to method for this kind of work.
Precision Excavation for Accurate Testing
For those of us running hydrovacs, this is our bread and butter. The Hydrovac Attachment Tool was built for these exact situations. It uses a focused jet of water to break up the soil and a powerful vacuum to suck it away, letting you carefully carve out the dirt from around the manhole base and pipe penetrations. It's a non-destructive digging method that exposes every critical surface without the risk of damage.
Picture this: you’re on a tight urban job site with a web of buried utilities around your manhole. With a tool like this, you can confidently daylight the exterior without sweating a utility strike. It’s faster, cleaner, and way safer. By exposing the barrel joints and pipe seals, you set the stage for a thorough cleaning and a truly meaningful manhole vacuum testing session.
A crucial part of preparation involves identifying potential hazards. Implementing tools such as a risk register can help systematically identify, assess, and mitigate these risks, ensuring a safer work environment for personnel involved in the testing.
Creating the Perfect Sealing Surface
After excavating, it's time for a deep clean. Every square inch that the test bladder touches has to be spotless—no dirt, no grease, no loose concrete. A single piece of grit can break the seal, letting air sneak past the bladder and causing the test to fail, even on a perfectly sound manhole.
This is another area where a hydrovac system really shines. You can switch from excavating to high-pressure washing in an instant, blasting away stubborn grime from the manhole walls and joints. The vacuum then sucks up all the dirty water and debris, leaving a clean, dry surface that's ready for the test head. If you're curious about the equipment that makes this possible, it's worth understanding the different types of vac truck pumps and how they generate that power.
One final wipe-down and a good visual check are all it takes. This obsessive attention to detail during prep is what separates a quick, successful test from a long, frustrating day of re-dos. It saves everyone time and money in the long run.
Putting the Manhole Vacuum Test into Action
Alright, your manhole is prepped and ready to go. Now for the main event—the test itself. This is where your careful prep work pays off, and precision becomes everything. A proper manhole vacuum test isn't just a matter of hooking up a pump and flipping a switch; it's a methodical process that ensures every result you get is reliable, repeatable, and something you can stand behind.
The whole point of this test is to mimic the years of external groundwater pressure a manhole will endure once it's in service. To do that right, you need to know your equipment inside and out and stick to the standards that govern the test. From how you place the sealing bladder to how you read the gauge, every single action directly affects whether that manhole gets a pass or a fail. It's a hands-on job where paying attention to the small stuff is what separates a quick, decisive test from a long day of chasing your tail.
This graphic really breaks down the essential prep work that has to happen before you even think about pulling a vacuum. It’s all about building a solid foundation for an accurate test.
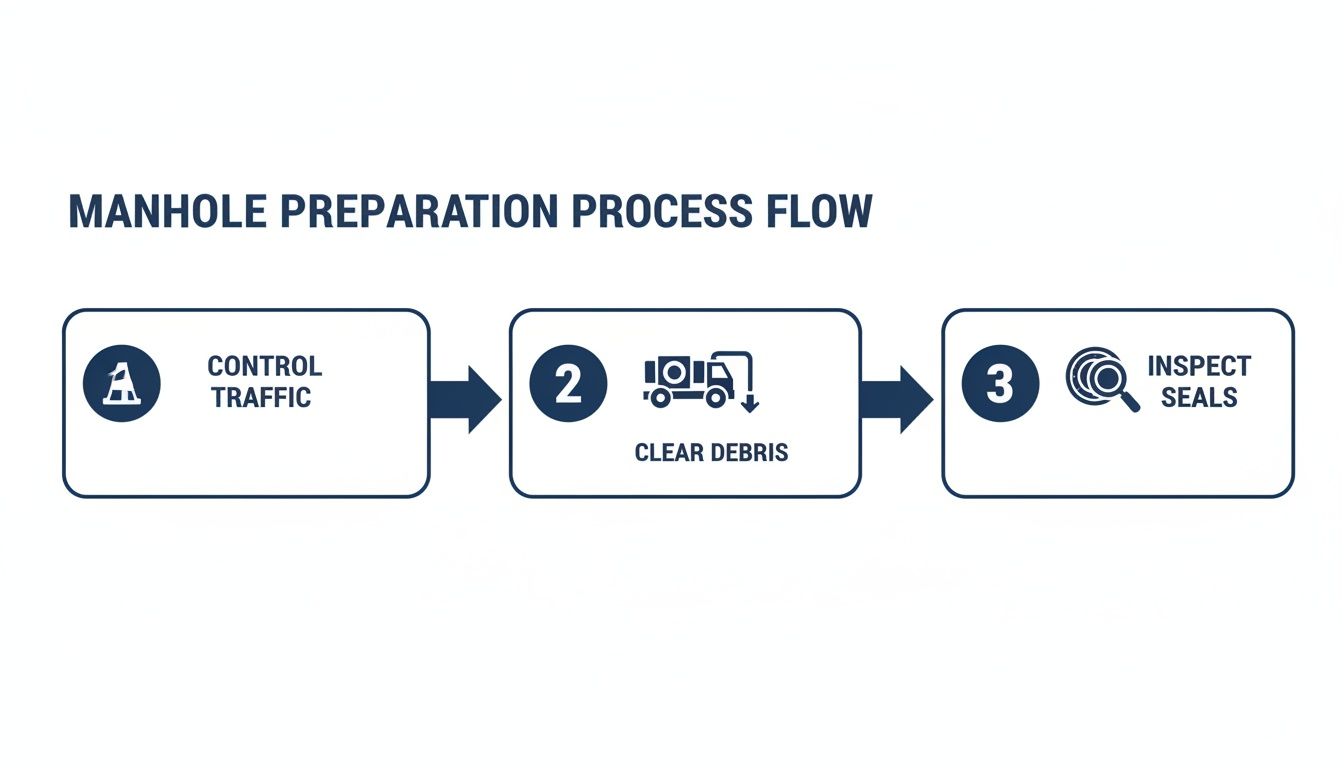
As you can see, controlling your site, getting it perfectly clean, and inspecting every seal are non-negotiable. Get these right, and the test itself will go much smoother.
Setting Up the Test Rig
First things first, you need to get the test rig set up. This starts with carefully lowering the inflatable sealing bladder—what we usually call a test head—into the manhole. Where you place it is critical. The bladder has to sit squarely on the clean interior surface of the manhole cone or top riser section to create an airtight seal.
With the bladder in position, it's time to connect the vacuum pump and your calibrated pressure gauge. Take a moment to double-check every hose connection. Make sure they're tight and free of leaks. Trust me, a loose fitting on your own gear can make it look like the manhole is failing and send you on a frustrating wild goose chase. Make sure the gauge is easy to see and out of direct sunlight or harm's way.
Drawing the Vacuum and Holding Pressure
Once the rig is fully assembled, go ahead and fire up the vacuum pump. Your target is the industry-standard level of 10 inches of mercury (inHg). This negative pressure creates the same force as roughly 11.3 feet of groundwater pushing on the outside of the manhole, giving it a serious test of its watertight integrity.
Keep a close eye on the gauge as the vacuum builds. As soon as you hit that 10 inHg mark, shut off the pump and start your timer. This is the start of the "hold time," the window where the manhole has to prove it can maintain the vacuum without any significant loss. The exact hold times you need to follow are laid out in standards like ASTM C1244 and change depending on the manhole's diameter and depth.
According to ASTM C1244, a manhole passes the test if the vacuum drop is no more than 1 inch of mercury within the specified time. This tiny buffer accounts for minor variables, but a steady drop is a dead giveaway that you've got a leak.
For a common 48-inch diameter manhole, you might only need a hold time of about a minute. But for a bigger 72-inch manhole, that could stretch to several minutes. Always, always check the project specs or the relevant ASTM table to get the right time for the job you're on. If you're curious about the physics behind this, you can learn more about how industrial systems generate this kind of force in our guide on vacuum suction power and air watts.
Interpreting the Results: Pass or Fail
During that hold time, your eyes should be glued to that gauge. If the needle holds steady or drops by less than 1 inHg when the timer goes off, congratulations—the manhole passes. That's your confirmation that the structure is watertight and ready to be put into service.
But if that gauge drops more than 1 inHg, the test is a fail. There's no ambiguity here. It's a clear signal that air is getting into the manhole from somewhere, whether it's a bad joint, a crack in the concrete, or a poor seal around a pipe. This is where meticulous prep work, especially with solutions like The Hydrovac Attachment Tool that let you expose and clean every joint perfectly, really shows its value.
The demand for this kind of technology is booming. The global vacuum leak detectors market is projected to grow from USD 952.8 million in 2025 to USD 1,706.3 million by 2035, which tells you just how much the industry relies on it. Manhole vacuum testing is a prime example, using negative pressure to find leaks that a camera could easily miss, achieving 95% accuracy in spotting breaches as small as 0.2mm. It's this precision that allows vacuum testing to cut false positives by 60% compared to old-school water testing, saving crews a massive amount of time on site.
Troubleshooting Common Failures and Ensuring Accuracy
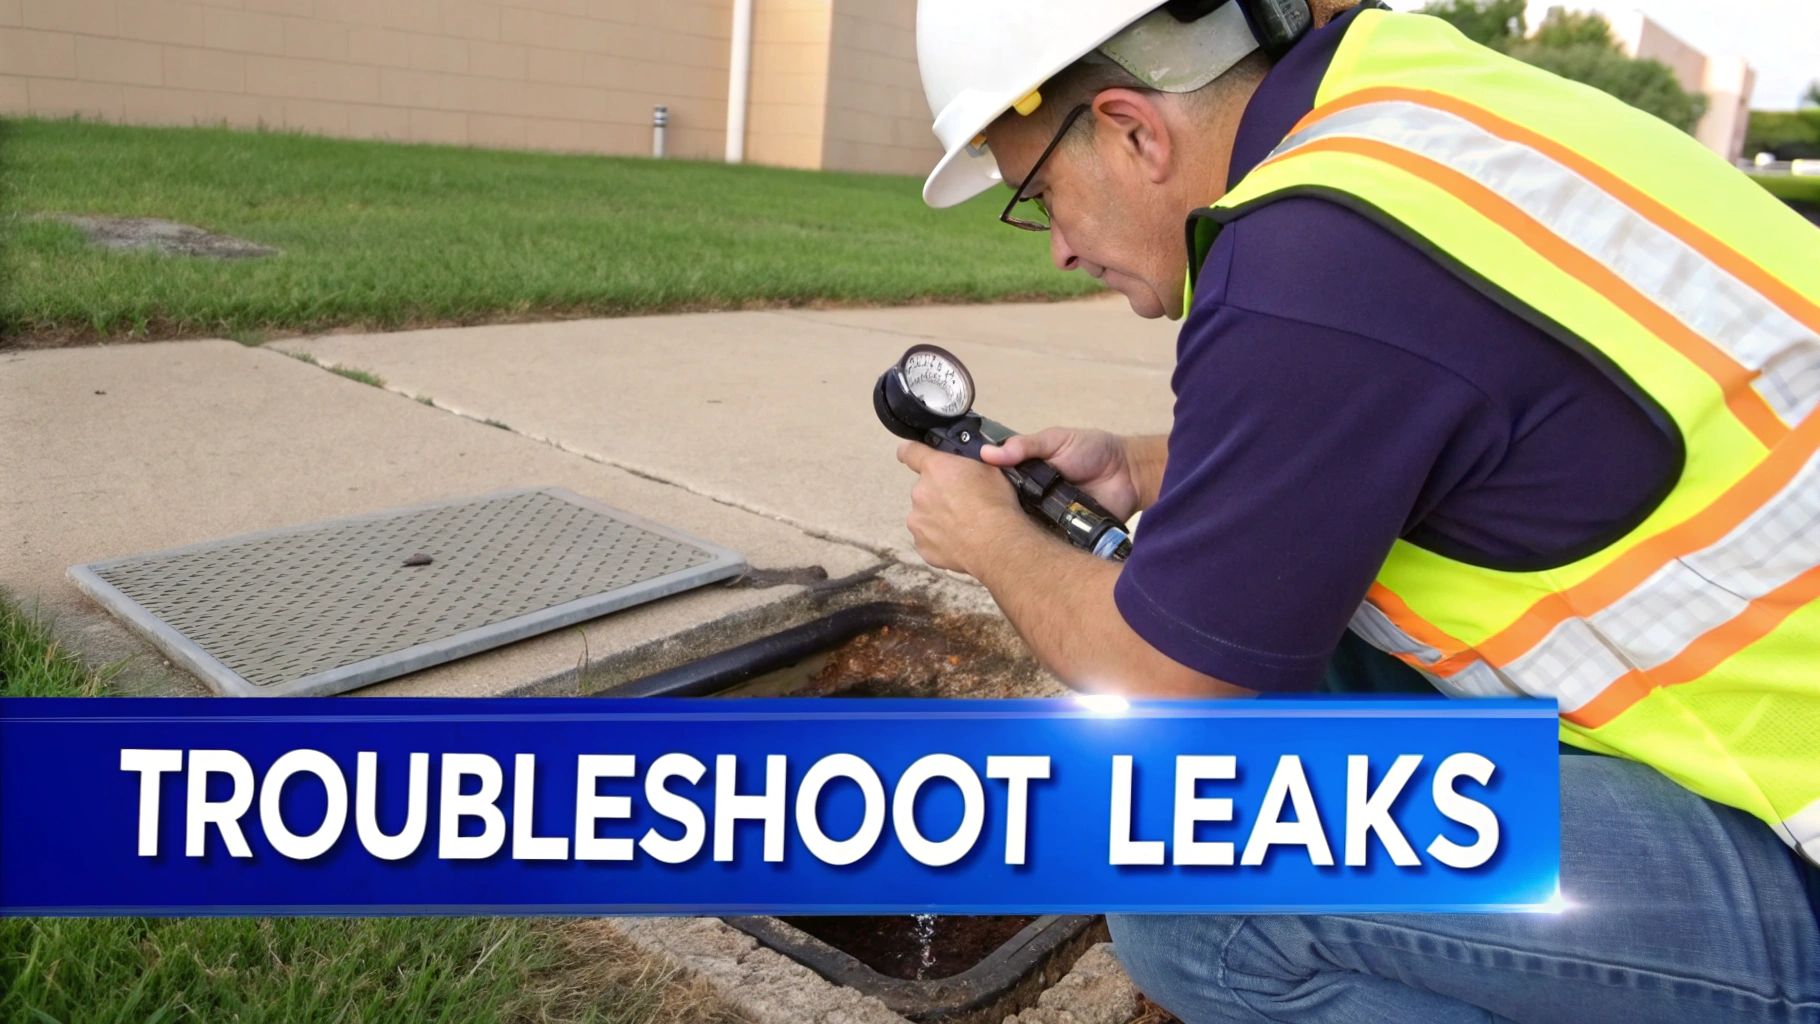
Watching the needle drop on your gauge during a manhole vacuum test can be frustrating, but a failed test isn't just an endpoint—it's a starting point. The real expertise isn't in just seeing a failure; it's in quickly figuring out why it failed. Pinpointing the root cause saves a ton of time and prevents expensive rework down the line.
When a test doesn't pass, the problem almost always boils down to one of a few usual suspects. It becomes a process of elimination, and you should always start with the most common culprits.
Finding the Real Leaks
A true failure means there's a physical breach somewhere in the manhole. These are the problems the test is actually designed to find, and locating them requires a methodical search.
Your investigation should zero in on these potential weak spots:
- Pipe-to-Manhole Connections: These flexible boots or grouted connections are notorious failure points. Look closely for cracks, improper seating, or any sign of deterioration.
- Barrel Joints: The seams between the concrete rings that make up the manhole body can separate or crack. These leaks are often small and easy to miss without a careful look.
- Frame Seal: The connection where the cast-iron frame meets the concrete cone is another classic trouble area. A bad seal here is a frequent cause of vacuum loss.
If you suspect a structural leak, a smoke test can be your best friend. Pumping smoke into the sealed manhole will often reveal the exact location of the breach on the outside, giving you visual confirmation before you start planning a repair.
The Problem of False Failures
More often than you might think, a failed test has nothing to do with the manhole itself. These false failures are maddening and usually point right back to your equipment or how you set it up.
The number one cause of a false failure is an improperly seated test bladder. A tiny piece of grit, a rough patch on the concrete, or even a slight misalignment can ruin the seal, causing the vacuum to drop just like a real leak.
Before you ever officially fail a manhole, always reset your gear. Deflate the bladder, give the sealing surface a good wipe-down (again), and carefully reposition the test head. Running the test a second time is the quickest way to confirm if the problem was your setup or the structure. It’s also worth double-checking your own hoses and connections—a loose fitting on your rig will fail a test every time.
How Perfect Prep Prevents Problems
This brings us full circle, right back to the importance of preparation. The single best way to get accurate results and avoid false failures is to start with a perfectly clean and fully exposed manhole. This is where precise excavation becomes a crucial part of the testing process itself, not just a step you do beforehand.
Using The Hydrovac Attachment Tool, you can carefully clear away all the soil and debris from around the manhole's exterior. This non-destructive digging method exposes every barrel joint and pipe connection, allowing for a thorough visual inspection before you even think about starting the test. By creating a clean, pristine surface, you eliminate the variables that lead to bad seals and inconclusive results, directly improving your test accuracy.
When done right, vacuum testing can prevent 20-30% of the groundwater infiltration that plagues sewer systems. In the construction world, where over 500,000 utility strikes happen globally each year, pairing hydrovac excavation with vacuum tests can slash these incidents by 45%. This approach aligns with the growing demand for safer, more efficient infrastructure, which is driving the vacuum waste systems market. To get a feel for this trend, you can discover more insights about the market drivers.
Mastering Reporting and Documentation
The job isn't done when you shut the pump off. After the real work of manhole vacuum testing is complete, the final, crucial step is turning that fieldwork into a clear, official record. This documentation is what validates your efforts and provides the hard data that project managers, city engineers, and repair crews rely on.
Think about it this way: without a solid report, a test is just a temporary check. A well-crafted document makes it a permanent part of that manhole's history. This isn't just about good practice; it's often a requirement for compliance, quality control, and the long-term management of critical infrastructure. It’s the proof in your pocket that the job was done right.
The Anatomy of a Good Test Report
Every report needs to be a perfect snapshot of the test, leaving no room for questions or confusion. You're telling the complete story of that inspection for anyone who might need to look it up months or even years down the road.
At a minimum, your report has to include:
- The Basics: Date, time, and the specific location, always including the unique manhole ID number.
- Test Specs: The required hold time and the starting vacuum pressure, which is almost always 10 inches of mercury (inHg).
- The Numbers: The vacuum reading right when the clock started and the final reading when the hold time was up.
- The Bottom Line: A clear and simple PASS or FAIL verdict. This is based on whether the pressure drop stayed within the allowable limit, typically less than 1 inHg.
A well-documented failed test is just as valuable as a passed one. Your detailed notes—including photos of suspected leak areas—are the roadmap that repair crews will use to efficiently locate and fix the problem, saving them hours of guesswork.
Why This Data Is So Important
This paperwork does a lot more than just close out a work order. Municipal engineers and asset managers feed these reports into their systems to track the health of their entire sewer network. When you provide consistent, accurate data, you help them spot recurring issues, schedule preventative maintenance before a small leak becomes a big problem, and justify budgets for future repairs.
For us contractors, meticulous record-keeping is what separates the pros from the amateurs. It builds a reputation for reliability and shows a commitment to quality that goes beyond just hooking up a hose. Understanding the big picture, including the documentation side, is key. And if your work involves the excavation and prep side of things, our guide on pipe volume calculation can be a handy resource for estimating debris removal.
In the end, your reports are a direct contribution to keeping public infrastructure safe and functional for years to come.
Your Top Questions About Manhole Vacuum Testing, Answered
Out on the job, theory and practice can be two different things. Even when you know the procedure inside and out, real-world situations always throw a few curveballs. Here, I'll tackle some of the most common questions I hear from operators and contractors about manhole vacuum testing. Think of this as a quick field guide to get you through those tricky moments.
Getting the small details right is what separates a smooth, compliant test from a frustrating day of re-dos. The goal isn't just to follow the steps, but to understand why they matter. That's what makes an operator truly great at what they do.
What's the Real Difference Between a Vacuum Test and an Air Pressure Test?
It all comes down to the direction of pressure and what you're looking for. A vacuum test uses negative pressure, pulling a vacuum on the manhole. This mimics the external pressure of groundwater trying to seep into the structure, making it the perfect way to spot infiltration leaks.
On the other hand, a standard air pressure test does the opposite. It uses positive pressure to push air from the inside out, checking for exfiltration leaks.
For new manholes, vacuum testing is the standard for a good reason. The biggest concern for new sewer infrastructure is stopping groundwater from getting in. Infiltration overloads treatment plants and can slowly erode the ground around the structure, leading to costly failures down the line.
How Often Do Existing Manholes Really Need to Be Tested?
There's no single magic number, but a good rule of thumb for proactive maintenance is to test existing manholes every 5 to 10 years. The right schedule for your system really depends on what you're dealing with.
You'll want to consider a few things:
- Age of the System: Older concrete and brick manholes are simply more likely to have cracks and failing joints.
- Local Ground Conditions: Is the manhole in an area with a high water table, aggressive soil, or heavy traffic? These factors accelerate wear and tear.
- Past Performance: If a specific manhole has been a problem child in the past, it definitely belongs on a shorter testing cycle.
Regular testing lets you catch small problems before they turn into massive, expensive sinkholes or system failures.
I always tell people to think of it like preventative medicine for their collection system. A small investment in routine check-ups helps you avoid major, emergency surgery later. It keeps the entire network running the way it should.
Can I Run a Vacuum Test in Any Kind of Weather?
Mostly, yes, but you have to be smart about it. Extreme cold is probably the biggest watch-out. It can make the rubber sealing bladder stiff and hard, preventing it from creating that perfect, airtight seal you need. If you're working on a frigid day, try warming the bladder up in your truck cab for a bit before you use it.
Heavy rain can also be a headache. It makes the site slick and dangerous, and if you're trying to pinpoint a leak after a failed test, the water can easily mask the source. While you can usually get the test done, it's often better to wait out a serious downpour. Your crew's safety and the accuracy of your test should always come first.
How Does a Hydrovac Attachment Make a Difference on Older Manholes?
This is where a hydrovac really shines. On older, existing manholes, the critical joints are often buried under years of compacted dirt, tangled roots, and who knows what else. Trying to dig that out with a mini-excavator is asking for trouble—it's slow, and you risk cracking the very structure you're there to test.
A precision tool like The Hydrovac Attachment Tool changes the game. It lets an operator use focused water pressure and vacuum to safely and carefully clear away all that material. You can completely expose the key manhole-pipe connections and barrel joints for a proper visual inspection and cleaning before the test even starts.
For aging infrastructure, this isn't just a "nice-to-have." It's essential. You get an accurate, reliable test result because you're starting with a clean, fully accessible structure. No more guesswork.
At Hydrovac Attachment, we build tools that make this kind of precision work possible. Our patented attachment helps you prepare sites safely and efficiently, ensuring every test is built on a foundation of accuracy. See how you can improve your workflow and get flawless results by visiting us at https://hydrovacattm.com.