

Vacuum Hose Clamp Functionality
In today’s hydrovac excavation sector, a high-performance vacuum hose clamp ensures both safety and efficiency. Far more than a simple band, it secures your suction line against debris, moisture, and vibration—crucial when digging near utilities or in constrained urban sites. It stops leaks, maximizes your Hydrovac Attachment Tool’s digging power, and keeps projects on schedule.
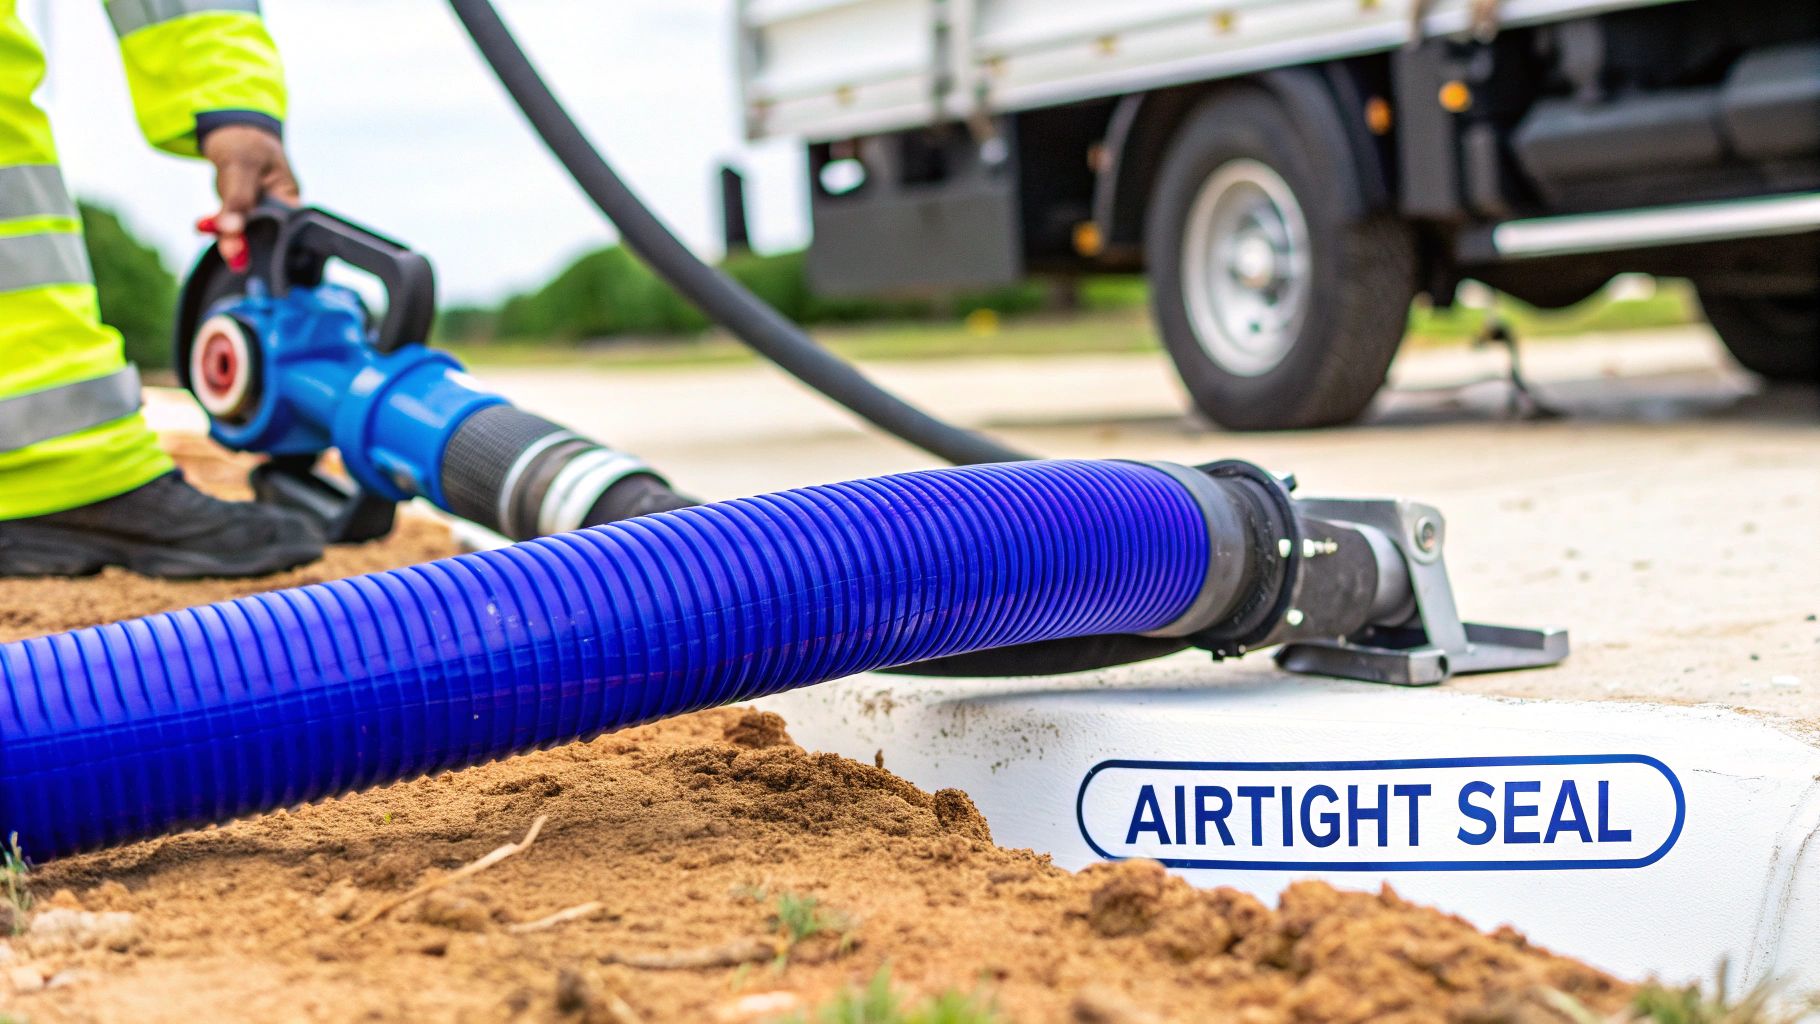
A tight clamp turns chaotic vibrations into a rock-solid connection, even when you’re cutting through clay or gravel.
- Prevents hose slippage under heavy vacuum loads
- Enhances hydrovac digging accuracy in sensitive zones
- Reduces downtime by stabilizing pressure
- Improves safety by eliminating air leaks
Real Jobsite Stories
At a municipal hydrovac dig in Alberta, a faded clamp gave way just before a critical utility expose, halving progress. Swapping in a precision-engineered clamp re-established full suction in under ten minutes—no rerouting, no re-drilling.
Key takeaway A durable clamp can save hours of downtime under heavy vacuum pressure.
Clamp Type Comparison
| Type | Best Application | Torque Range (in-lb) | Pressure Rating (inHg) |
|---|---|---|---|
| Worm-Drive | General-Purpose Hydrovac | 15–25 | Up to 22 |
| Constant-Tension | Thermal Cycling | 10–20 | Up to 18 |
| Ear Clamp | Tight Spaces | 20–30 | Up to 25 |
Global demand for vacuum hose clamps in hydrovac and industrial segments spiked alongside construction and pipeline services. The market hit USD 2.39 billion in 2023 and is on track to reach USD 3.24 billion by 2032 with a CAGR of 3.43%. Read more about hose clamp market findings
Key regional drivers include:
- North America’s robust hydrovac services and OEM specifications
- Asia-Pacific’s rapid urbanization and infrastructure expansion
Check out our guide on vacuum hose accessories for detailed product recommendations and pairing tips.
Integrating With Hydrovac Attachment Tool
When paired with the Hydrovac Attachment Tool, a quality clamp transforms setup into a sub-30-second routine. Designed for 2.5-inch wet vac lines, the tool leverages a flush clamp seal to maintain consistent suction even in abrasive or wet soils.
- Quick deployment in under 20 seconds
- Reduced splashback and slurry spillage
- Less cleanup and a clearer work area
Next Steps
Armed with these hydrovac insights, you can choose the right clamp and install it like a pro. A solid clamp isn’t optional—it’s the backbone of safe, efficient hydrovac excavation.
Key Takeaways
- Pick a clamp rated for your target pressure to avoid sudden failures.
- Inspect clamps at the start of every shift and torque them monthly.
- Keeping seals tight means fewer interruptions and a safer jobsite.
Perform Initial Hydrovac Attachment Tool Setup
Imagine you’re on a dusty hydro excavation site at dawn: seating that vacuum hose clamp correctly lays the foundation for a leak-free run. Start by aligning the vacuum hose port with the Hydrovac base connector until the clamp groove hugs the hose evenly. That uniform squeeze prevents slippage once you engage the high-powered suction.
Before you tighten anything, calibrate your torque wrench per the Hydrovac manual. Staying within 18–22 in-lb for a 2.5″ wet vac keeps both clamp and hose safe from overloading.
- Alignment Guide: Slide the tool until the guide tabs sit flush on the hose end.
- Torque Driver: Set it between 18–22 in-lb for 2.5″ wet vac applications.
- Quick-Release Fitting: Verify it snaps into place without forcing it.
Once the groove lines up, slide on the band clamp and drop in a thin shim for a quick concentricity check. Tack the clamp lightly, then give it a gentle pull—any rotation means you should realign before full torque.
Mounting Bolt Torquing And Engagement
An even bolt-tightening pattern is non-negotiable for high-vacuum performance. Work in a crisscross sequence and torque each mounting bolt to 60–80 ft-lb so the tool interface stays flat.
I’ve seen crews lose hours because a single bolt was over-torqued, warping the port and cutting seal life by nearly 30%. Consistency here saves headaches later.
- Confirm each bolt follows the crisscross path.
- Check the port and hose face remain parallel.
- Slip feeler gauges under vibration dampers for micro-adjustments.
Proper bolt torque and clamp seating turn a satisfying click into weeks of leak-free operation under high suction.
After torquing, inspect the clamp groove one more time. If anything shifted, back off, realign, and start the sequence again.
Quick Deployment And Testing
Lock in the quick-release fittings and you’ll attach or detach the hose in under 5 seconds—ideal for rapid hydrovac relocations.
- Power on the vacuum system and listen for any hissing around the clamp.
- Run a soap-bubble test along the seam to spot micro-leaks.
- Watch your gauge—aim for a steady 18 inHg before digging in.
A seasoned crew can master this routine in under 20 minutes. Timing each phase keeps everyone on schedule and cuts idle time on the pad.
| Step | Time Estimate | Note |
|---|---|---|
| Alignment and tacking | 5 minutes | Use alignment guides |
| Bolt torquing sequence | 7 minutes | Crisscross pattern |
| Quick-release testing | 8 minutes | Soap bubble and gauge verification |
Logging these times ensures your team delivers reliable, repeatable performance on every hydrovac project.
Secure Vacuum Hose With The Right Clamp
Tight seals under heavy vacuum start with picking the clamp that matches your hose and site conditions. Constant-tension models adapt as temperatures swing, worm-drive designs give you fine torque control, and ear clamps slip into tight spots without fuss.
- Worm-drive offers 15–25 in-lb repeatable torque for a 2.5" wet vac
- Spring-loaded clamps maintain steady pressure through thermal cycling
- Ear clamps lock permanently and excel in compact fittings
In one Alberta oil-sands hydrovac operation, swapping generic bands for spring-tension clamps cut downtime by 40%—proof that the right clamp pays off in the field.
Installation Workflow
Getting the clamp lined up perfectly prevents slippage and air leaks on your Hydrovac Attachment Tool. Think of it like seating a drum lid: any tilt or gap invites air in and kills your suction.
- Position the clamp about ¼" past the hose fitting ridge
- Hand-tighten until the band sits evenly around the hose
- Torque the clamp in a crisscross pattern for uniform pressure
- For a 2.5" diameter hose, apply 18–22 in-lb with a calibrated driver
The infographic below breaks down the Align, Position, Torque sequence for leak-proof performance: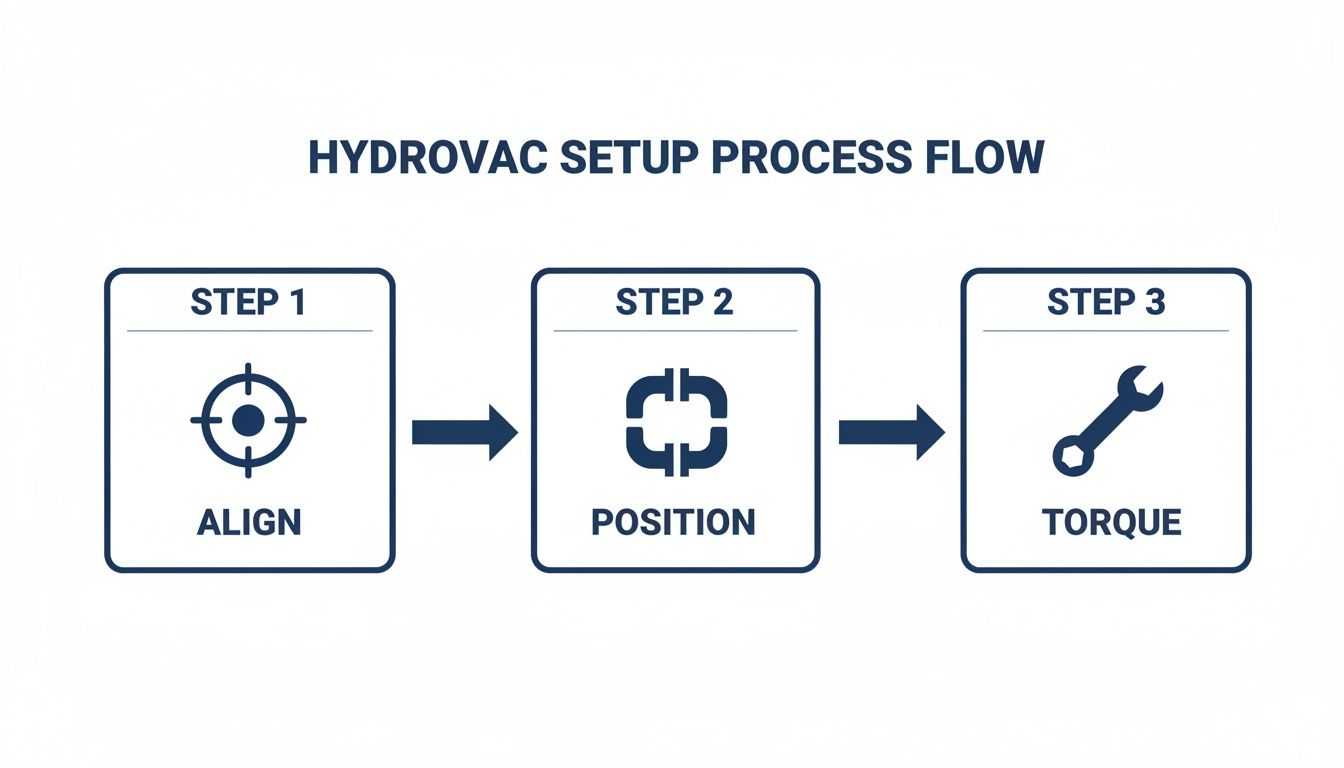
Materials And Market Trends
In hydrovac and automotive shops alike, these clamps secure hoses under pressures up to 25 inHg and temperatures from –40°C to 150°C. Globally, the hose clamp market hit USD 2.47 billion in 2024 and is projected to reach USD 3.4 billion by 2032 at a 4.50% CAGR.
For deeper data, check the hose clamps market report.
Maintenance And Inspection Tips
Regular inspections catch wear before it becomes a problem.
- Perform a quick visual check at each shift start
- Run a torque audit monthly to spot loosening or fatigue
- Replace any clamp with visible deformation or corrosion
Consistent maintenance reduces unexpected shutdowns by up to 30% in field operations
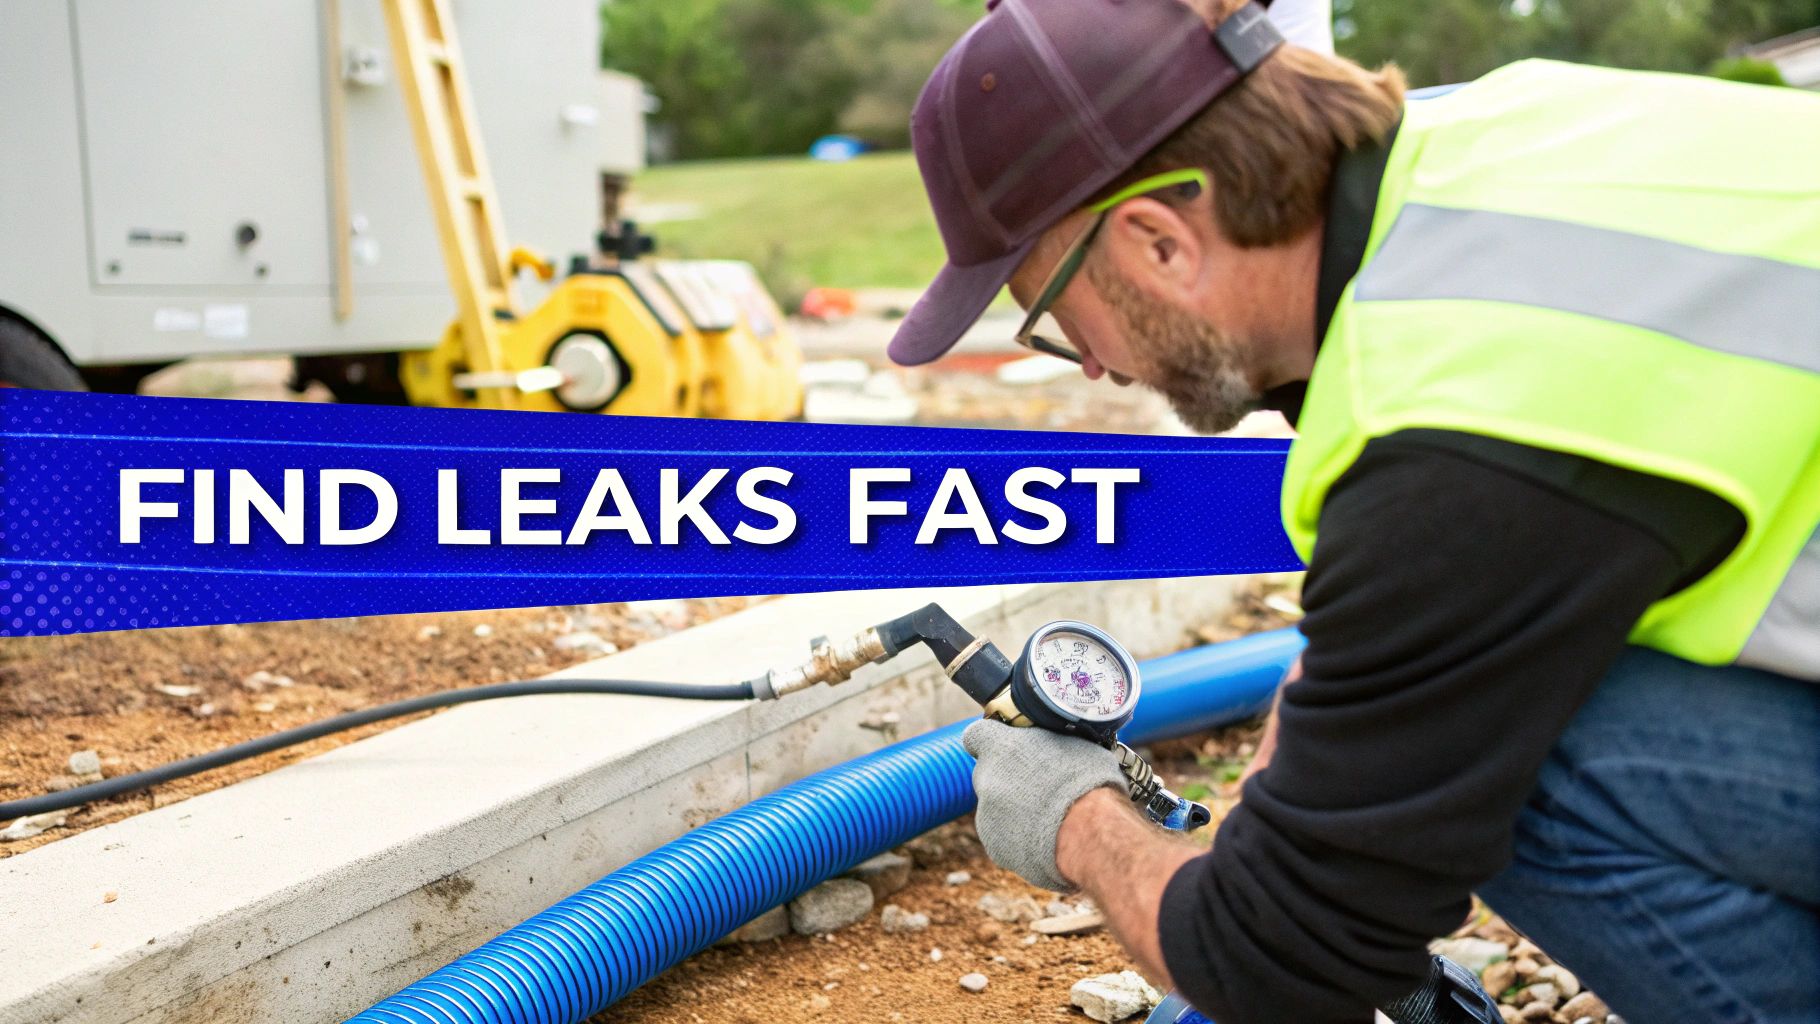
Troubleshooting Suction Loss
A sudden suction dip usually points to clamp slippage or hidden hose damage. Start your diagnosis with a soap-film test or a UV dye scan to locate micro-leaks.
- Inspect clamp seating angle and retorque if needed
- Examine the hose for abrasion, cracks, or kinks at the clamp
- Switch to a constant-tension clamp if thermal expansion is the culprit
Plan to swap out worm-drive bands after 500 heat cycles or 12 months. Spring-loaded versions generally last 2 years under normal use.
Safety Precautions
Handling clamps under tension requires care:
- Wear vibration-dampening gloves and eye protection
- Keep hands clear of pinch points during the tightening sequence
Hydrovac Attachment Tool Integration
The Hydrovac Attachment Tool simplifies clamp alignment on a 2.5" wet vac tube, ensuring the groove lines up perfectly with the nozzle barb. Check out our guide on adapting vacuum hoses to PVC in our article on hose adapters to PVC.
Install Checklist
- Confirm clamp type matches your pressure and thermal requirements
- Align the clamp groove with the Hydrovac nozzle barb
- Torque to 18–22 in-lb in a smooth, even motion
- Test the seal with a soap bubble or vacuum gauge
- Log the installation date and schedule the next inspection within 30 days
Following this routine delivers reliable, leak-proof performance—and keeps your operation running at peak uptime.
Choose Durable Materials For Hydrovac Excavation
When you’re tearing through tough ground, your vacuum hose clamp needs to stand up to corrosion and abrasion. Stainless steel might cost more, but it can shrug off rust in damp or acidic soils. On the flip side, reinforced plastic keeps things lightweight—ideal if you’re swapping clamps frequently to reduce operator fatigue. And spring-loaded alloys? They maintain constant tension even as temperatures swing.
Comparison Of Vacuum Hose Clamp Materials
Use this chart to match clamp properties with real-world scenarios. It highlights pros, cons, and the jobs each material excels in.
| Material | Durability Rating | Relative Cost | Ideal Application |
|---|---|---|---|
| Stainless Steel | 9/10 | High | Corrosive or wet soil |
| Reinforced Plastic | 6/10 | Low | Light-duty digging |
| Spring-Loaded Alloy | 8/10 | Medium | Thermal cycling operations |
| Composite Blend | 8/10 | Medium | Weight-sensitive rigs |
Use stainless steel for salty environments. Reinforced plastic shines on short, nonabrasive jobs. Spring-loaded alloys handle heat fluctuations. Composites are a solid middle ground when weight and grip both matter.
Decision Matrix Factors
Picking the right clamp isn’t guesswork—it’s balancing:
- Budget vs. replacement frequency: Track cost per hour to meet uptime goals.
- Wear under vibration: Abrasive soils eat through weaker materials fast.
- Site conditions: Hot, cold, chemical exposure—all influence lifespan.
- Tool compatibility: Make sure it fits the Hydrovac Attachment Tool on your 2.5" wet vac.
In field trials, crews compare a $20 steel clamp lasting 120 hours (roughly $0.17/h) against a $5 plastic band at 50 hours ($0.10/h). Composites clock in at 80 hours for $15 (about $0.19/h), but save mid-shift swaps.
Expert Insight Durable clamp materials can cut annual replacement costs by 30%.
Emerging Composite Blends
Recent tests in Alberta’s shale shed light on new polymer-fiber mixes:
- Grip increases by 50% thanks to embedded spring fibers.
- Weight drops up to 20%, easing clamp changes.
- Chemical resistance stands up to hydrocarbons.
Operators found these blends lasted 1.5 times longer than steel under rocky impact.
Field Test Insights
Running identical clamps over moraine beds revealed:
- Stainless steel kept a solid seal for 120 hours before spotting surface rust.
- Reinforced plastic bowed out after 50 hours of gravel abrasion.
- Spring-loaded alloys held tension for 90 hours, weakening only under extreme heat shifts.
| Material | Test Duration | Failure Mode |
|---|---|---|
| Stainless Steel | 120h | Surface rust |
| Reinforced Plastic | 50h | Band cracks |
| Spring-Loaded Alloy | 90h | Tension reduction |
Field data drives smarter material choices for real sites.
Scenario Material Recommendations
Match your mission:
- Coastal utility work with salt spray? Lean on stainless steel or marine-grade composites.
- Urban trenching under light loads? Reinforced plastic speeds you up and saves cash.
- Night shifts in freezing temps? Spring-loaded alloys resist contraction.
- Continuous thawing or hot operations? Composites hold up under heat.
Logging clamp swaps in your maintenance records cuts surprise failures by 40%.
Choosing The Right Clamp
Consider these service intervals:
- Replace steel clamps every 200h or 12 months.
- Inspect plastic bands monthly or every 100h.
- Swap composites at 150h or at the first sign of wear.
Track dates in your maintenance log. It’s a simple habit that prevents downtime and keeps crews moving.
Head to Hydrovacattm.com for detailed specs and part numbers. And always follow the torque guidelines in the Hydrovac Attachment Tool manual—it’s the best way to get a leak-free seal.
Resolve Suction Loss And Leak Issues
Nothing drains performance like an unexpected seal failure. A vacuum hose clamp that slips or warps under suction can send your hydrovac digging power into freefall.
Catching these problems early is non-negotiable. A quick, five-minute check today prevents hours of downtime tomorrow.
- Visual Check: Inspect the clamp for irregular shapes or dents in the housing
- Tactile Test: Grip the hose firmly—any wobble is a red flag
- Hose Inspection: Scan for kinks, abrasions or exposed fibers
- Groove Alignment: Confirm the clamp sits squarely in its groove before tightening
Rapid Inspection Routine
Start by applying a fluorescent dye around the clamp area, then scan with a UV light. Hidden cracks glow vividly, revealing flaws you’d never spot by eye. Next, attach a pressure gauge at the clamp zone to record suction levels.
If readings dip below 18 inHg on a properly sealed 2.5″ wet vac, you’ve got a leak. From there, decide whether to patch the hose, swap in a fresh clamp or replace the entire section.
Early detection cut downtime by 30% on an urban hydrovac excavation in Ontario
Always carry an emergency field kit. A few wraps of high-strength seal tape plus a temporary spring clamp will rescue your suction until permanent parts arrive.
Pressure Testing And Interpretation
Once you’ve applied a temporary fix, run the soap-bubble test. Brush soapy water along the seam and watch for bubbles under vibration—each one points to a microscopic leak.
| Test Method | Leak Indicator | Action Required |
|---|---|---|
| UV Dye Inspection | Fluorescent Cracks | Replace Clamp Or Hose |
| Pressure Gauge Drop | > 2 inHg Deviation | Retighten Or Swap Clamp |
| Soap-Bubble Bubbles | Visible Drift Spots | Clean Surface And Retest |
This data-driven process slashes repair costs and keeps your Hydrovac Attachment Tool humming.
The industrial vacuum clamping technology market sits at USD 1.5 billion in 2024, projected to hit USD 2.8 billion by 2033 at a 7.5% CAGR. Discover more insights about industrial vacuum clamping technology in this market research
Field experience shows inferior clamps fail under vibration in over 5% of cycles, triggering average downtime losses of $50,000 per incident. With Asia-Pacific’s manufacturing surge and North America’s $2 trillion construction boom, reliable seals are mission-critical.
For detailed metrics on vacuum suction and air watts, check out our guide on vacuum suction power and air watts to align your clamp inspections with true system performance.
Emergency Tip: Store at least two OEM clamps and a roll of seal tape in every service van. That small prep move saves big headaches when a leak pops up.
Quick Inspection Protocol:
- Visual And Tactile Survey In Under Two Minutes
- UV Dye Scan And Gauge Reading
- Temporary Clamp And Seal Tape Fix
- Final Pressure Test And Installation Of Permanent Parts
Regular checks and prompt repairs keep your vacuum hose clamp leak-free—and your hydrovac excavation running at full power.
Frequently Asked Questions
What Torque Should I Use For A 2.5-Inch Vacuum Hose Clamp
Applying 18–22 in-lb hits the sweet spot. It seals tightly without gouging the hose. In field tests on clay soil, staying in that range kept leaks at bay for over 100 hours straight.
How Often Should I Inspect Vacuum Hose Clamps
A quick look at the start of each shift spots loose or warped clamps early. Once a month, run a full torque audit with a calibrated driver to catch any tension loss. This routine prevents surprises and keeps the Hydrovac system humming along.
| Inspection Interval | Action |
|---|---|
| Start Of Shift | Visual tension check |
| Monthly | Calibrated torque audit and replacement |
Regular inspections cut clamp failures by 30%, safeguarding your uptime.
Can I Reuse Clamps After Removal
Spring clamps that snap back to shape and still feel firm can go back into service. But if you see bent bands or distorted slots on worm-drive clamps, toss them. A simple test: press the clamp against a nozzle barb under light pressure to gauge its grip.
What Safety Gear Is Required
Protect your hands and eyes when working with vibrating tools and pressurized parts.
- Vibration-dampening gloves to reduce fatigue
- Impact-rated goggles or face shield
- Steel-toed boots for stable footing
- Retorque driver calibrated in in-lb range
Ready to secure your vacuum hose clamp with a reliable solution? Upgrade your digging workflow today with the Hydrovac Attachment at Hydrovac Attachment and experience leak-free performance.