

When you hear "gravel vacuum," you probably think of cleaning a fish tank. It's a simple idea: use water and suction to lift debris out of gravel without making a mess. Now, what if you took that same basic principle and scaled it up for professional yard care and residential digging?
That's exactly what we're talking about here. The core concept of hydro vacuuming is the same. We just swap the fish tank for a backyard and the tiny plastic tube for a high-pressure water jet and a powerful wet vac. By adding the Hydrovac Attachment, you essentially turn a standard wet vac into a precision excavation tool. This is not a tool for massive hydrovac trucks, but a mobile solution for your wet vac hose to clear small amounts of debris for jobs like fence post digging or safely digging up pipes.
Rethinking the Gravel Vacuum for Professional Landscaping
This guide isn't about aquarium maintenance. It's about taking that fundamental "gravel vacuum" idea and applying it to tough jobs in the yard care and residential digging industry. We're going to walk through a modern, mobile setup that brings together three pieces of equipment you likely already own:
- A standard wet/dry vacuum
- A high-pressure power washer
- The innovative Hydrovac Attachment
This powerful trio creates a legitimate hydro-excavation system, giving you the kind of surgical accuracy you need for delicate or demanding tasks, from setting fence posts to carefully exposing buried pipes without damage.
From Hobbyist Tool to Professional Solution
Forget the back-breaking work of shovels and augers. This professional-grade "gravel vacuum" system uses the focused power of water to break up compacted soil, dense clay, and stubborn gravel. The attachment is the key—it channels the water jet and the wet vac’s suction into one contained, highly effective zone.
As the water liquefies the ground, the vacuum sucks the slurry away instantly. It's the ideal solution for digging clean, precise fence post holes or carefully exposing buried pipes and utility lines without the risk of damage. Because the process is so contained, it dramatically cuts down on mess and site disruption. To get a better handle on the underlying mechanics, check out our detailed guide on what vacuum excavation is and how it works.
The real advantage here is control. Traditional digging methods are aggressive and imprecise, often leading to damaged utilities or messy work sites. By adapting the 'gravel vacuum' concept with the Hydrovac Attachment, professionals gain the ability to remove soil with precision, minimizing risk and cleanup time for any residential digging project.
To truly understand this evolution, let's compare the simple aquarium cleaner to a professional hydro vacuum system.
From Aquarium Cleaning to Professional Excavation
This table highlights how a basic concept can be engineered into a powerful industrial tool.
| Feature | Aquarium Gravel Vacuum | Professional Hydro Vacuum System |
|---|---|---|
| Power Source | Manual Siphon / Hand Pump | High-Pressure Power Washer & Industrial Wet Vac |
| Primary Goal | Remove fish waste & debris from gravel | Excavate soil, clay, and compact materials |
| Scale | Small, handheld plastic tube | Heavy-duty attachment on industrial hoses |
| Precision | Low; gentle suction for small areas | High; targeted jet for precise, non-destructive digging |
| Debris Removal | Lifts light debris into a bucket | Suctions heavy slurry directly into a containment tank |
The jump from a hobbyist tool to a professional solution is all about applying power, precision, and smart engineering to a proven concept.
The Science of Precise Suction
Mastering controlled suction is what makes this all work. The Hydrovac Attachment creates a focused zone that makes low-mess operations possible. It’s a concept so effective that even in the aquarium world, the market for precision gravel vacuums reached USD 425.6 million globally—a testament to the value of targeted debris removal.
Getting this professional system set up is almost as simple as its hobbyist counterpart. You just connect the power washer wand to the 2.5-inch wet vac hose, secure the clamp, and you're ready to go. Our own field tests have shown this setup reduces splashback by up to 80% compared to traditional digging methods. This isn't just a clever idea; it's a significant shift in how excavation gets done, prioritizing efficiency and safety over brute force. You can dive deeper into the market trends for this technology over at growthmarketreports.com.
Getting Your Precision Excavation System Set Up
Before you can start moving dirt, the first step is always getting your gear assembled correctly. You're not just grabbing tools; you're building an integrated digging system. Getting this right is the key to unlocking the power and precision you need for professional yard work and residential excavation. This whole process revolves around one thing: properly connecting your wet vac, power washer, and the Hydrovac Attachment into a single, efficient unit.
The secret to making this setup work is pairing the right equipment. You need to create a balanced system where the water pressure is strong enough to liquefy the soil, but the vacuum has enough muscle to suck up the slurry without getting bogged down.
Matching Your Components for Peak Performance
Let's talk specs. For the vacuum, you'll want a wet/dry vac with at least 5 peak horsepower and a standard 2.5-inch diameter hose. That hose size is crucial because it's what the Hydrovac Attachment is built for. A vacuum with a high CFM (cubic feet per minute) rating is what really does the heavy lifting, ensuring it can pull all that wet, heavy material you're about to excavate. If you're shopping for one, our guide on choosing a high CFM shop vac is a great place to start.
For the other half of the system, your power washer, aim for a unit that puts out between 1,500 and 3,000 PSI (pounds per square inch). This range is the sweet spot. It's powerful enough to slice through compacted dirt and clay but gives you enough control to avoid accidentally damaging buried pipes or utility lines. Sticking to these specs means your professional gravel vacuum setup will work exactly as it should.
This visual really simplifies the assembly process for getting your hydro-vacuuming system running.
As you can see, it's a simple sequence: connect the hose, attach the wand, and fire up the system.
Connecting the Hydrovac Attachment
Once you’ve got your power washer and vac ready, the actual assembly is straightforward and doesn't require any tools. The Hydrovac Attachment is what brings the whole system together, combining the force of the power washer with the suction of your wet vac.
- First, slide the base of the attachment firmly onto the end of your 2.5-inch wet vac hose. You want a good, solid seat.
- Next, use the hose clamp that comes with it to lock it down. This is what creates the airtight seal, so don't skip it. Hand-tighten it until it’s snug—you shouldn't be able to twist or pull the attachment off easily.
- Finally, slide your power washer wand through the attachment and pop the nozzle cap over the end. That cap is what contains the high-pressure spray, focusing it down into the ground and preventing the messy splashback you get with other methods.
My Two Cents: Before you hit the power switch on your vacuum, give the whole setup a quick once-over. The most common rookie mistake is not tightening the hose clamp enough, which kills your suction. Taking five seconds to check for air leaks will save you a ton of frustration on the job.
With that, you’re assembled and ready for action. You've essentially built a professional-grade hydrovac system that’s designed for real-world jobs like setting fence posts, digging trenches for irrigation, or safely exposing utilities without the risk and mess of a shovel.
Mastering Techniques for Common Digging Tasks
Alright, theory is one thing, but putting your professional gravel vacuum system to work on a real job site is where you'll see what it can really do. Once your gear is assembled and running, you can tackle digging tasks with a level of precision that a shovel or auger just can't touch. This system is all about turning messy, back-breaking jobs into clean, efficient operations.
We're going to walk through the specific techniques for three of the most common jobs you'll run into. These aren't just hypotheticals; they're scenarios that show you how to adapt your approach based on the soil, the objective, and the environment. Getting the most out of a setup like this is all about technique, not just brute force.
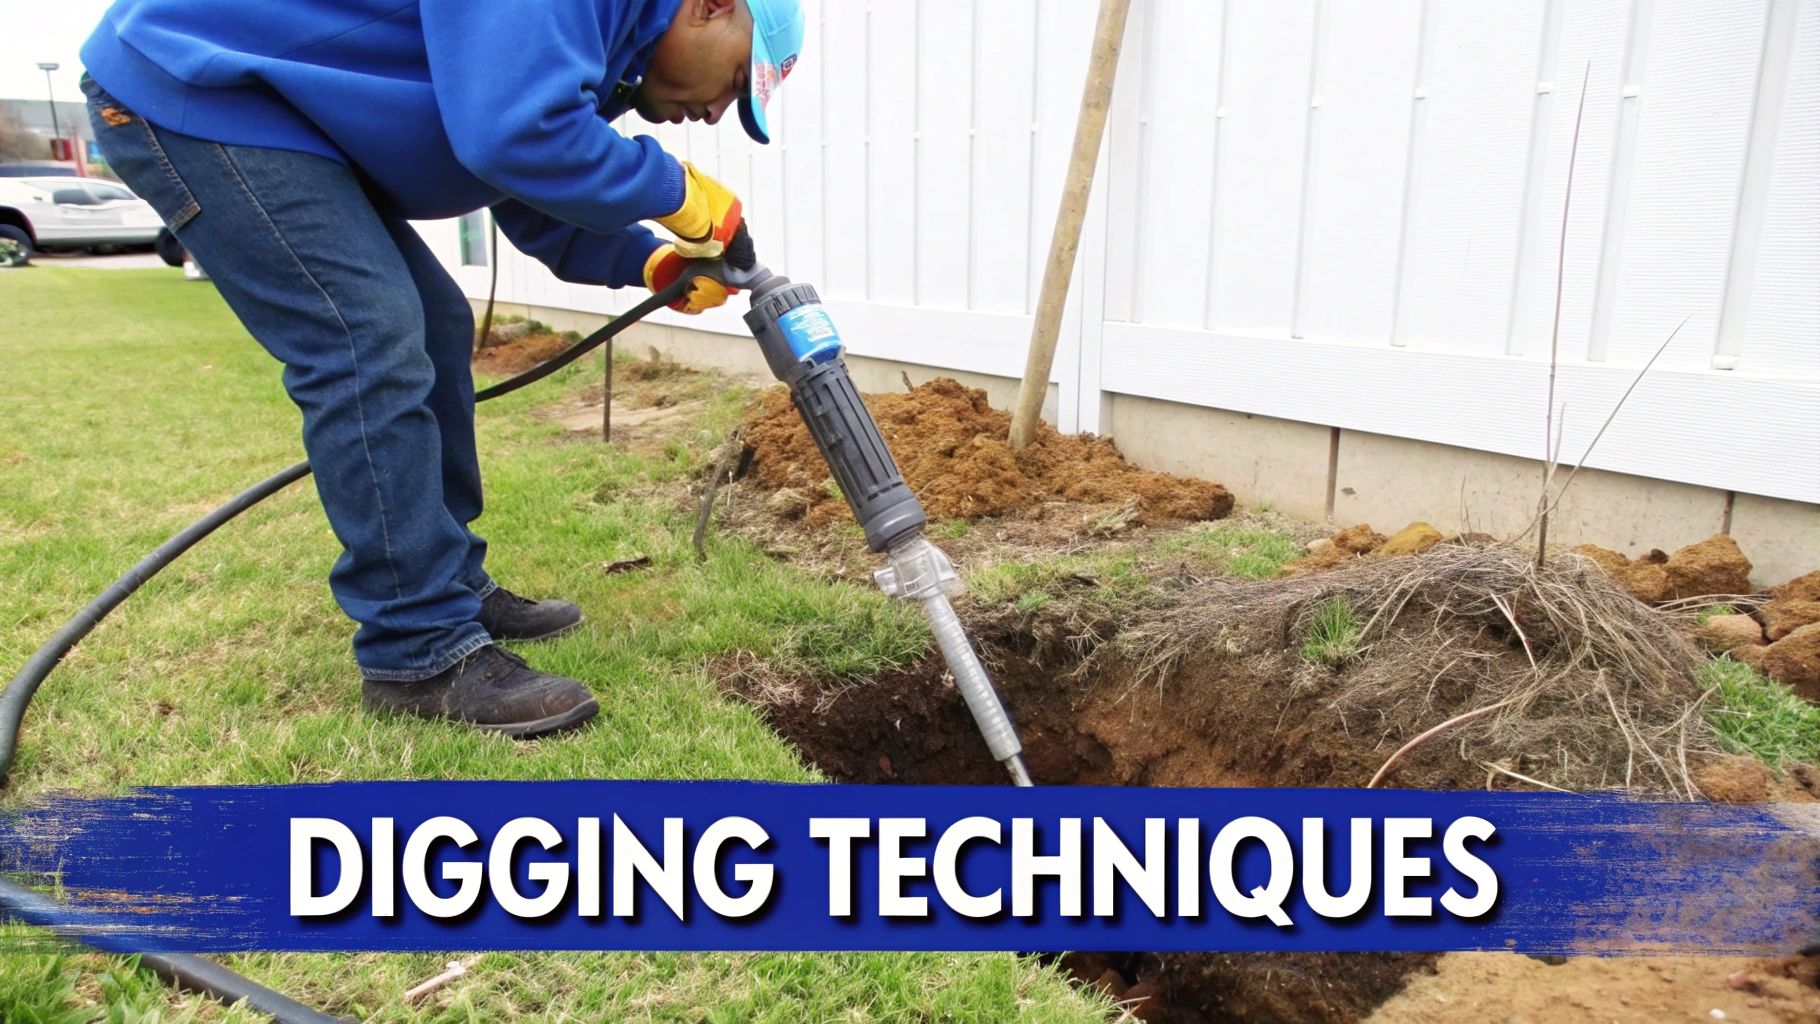
Digging Clean Fence Post Holes
Anyone who's set a fence knows you need a clean, uniform hole. The problem is that augers tear up lawns and shovels leave a huge pile of dirt to deal with later. Your hydro vacuum system, especially when paired with the Hydrovac Attachment, drills perfect post holes with almost zero mess.
First, mark your spot. Hold the wand vertically and give it a gentle squeeze of water pressure to break the surface. As you start to penetrate, angle the tool just a bit and move it in a circular motion to carve out the diameter of the hole.
If you hit hard-packed soil or clay, don't just lean on the trigger. Instead, use a pulsing motion with the power washer. These quick bursts of high-pressure water act like a tiny jackhammer, breaking up that dense material way more effectively than a constant stream. Let the vacuum do its job, clearing the slurry as you dig.
Pro Tip: For a perfectly straight, cylindrical hole, keep that wand moving. If you let it sit in one spot for too long, you’ll end up with a bell-shaped cavity at the bottom. That can make getting the post plumb a real headache.
This method isn't just faster; it's incredibly clean. All the excavated material gets sucked straight into your wet vac, leaving you with a tidy hole and no mound of dirt to haul away.
Safely Exposing Buried Utilities
"Potholing," or daylighting, is the careful process of exposing underground utilities like pipes and cables. We all know that hitting one of those with a shovel can be a costly, dangerous disaster. This is where the Hydrovac Attachment on your wet vac hose becomes an essential tool for damage prevention.
When you're exposing a marked utility line, precision is everything. Start digging a few inches away from the line—never directly on top of it. Your goal is to gently wash the soil away from the utility, not to blast it with high-pressure water.
- Angle the Wand: Hold the wand at a 45-degree angle, pointing away from the utility. This lets the water slice the soil away from the pipe or cable without making a direct impact.
- Manage Water Flow: Use just enough pressure to turn the soil into a slurry. You're not in a race; you're performing surgical excavation.
- Listen to the Vacuum: Pay close attention to the sound of your wet vac. You'll hear the pitch change as it pulls up different materials, like small rocks versus soft mud. This aural feedback helps you understand what's happening underground, out of sight.
This controlled method is the heart of non-destructive digging and is infinitely safer than mechanical methods. For those deeper holes where you're losing reach, adding a specialized vacuum wand extension can be a game-changer for maintaining control.
Creating Narrow Irrigation Trenches
Putting in irrigation lines or low-voltage landscape lighting means digging long, narrow trenches. Doing it with a shovel is exhausting work that leaves a wide, messy trench requiring a ton of backfill and landscape repair. Your hydro vacuum system, on the other hand, can carve out a clean channel just a few inches wide.
Start at one end of your planned trench and work your way backward. Keep the wand tip close to the ground, almost like you're drawing a line in the soil. The combination of the water jet and the instant suction carves out a perfect, clean trench as you go.
For longer runs, it's best to work in manageable sections of a few feet at a time. This approach helps you maintain a consistent depth and ensures the vacuum can keep up with the volume of mud you're creating. This technique is a lifesaver in established lawns where you want to minimize turf damage. That narrow incision is far easier to patch up than a wide gash from a shovel.
These techniques are borrowed straight from the industrial hydro-excavation playbook. For hydrovac crews daylighting some of the over 2 million utility locates in North America each year, proper technique is non-negotiable. Angling the vacuum at 45 degrees and pulsing the suction dislodges material without causing the 30% substrate loss that can happen with improper use. This precision is mirrored in the Hydrovac Attachment's lightweight polymer design, which lets you knock out residential tasks like fence post prep up to 3x faster. With 40% of facilities managers reporting downtime from messy excavations, tools that work this clean can cut operational costs by 25%.
Taking on Specialized Jobs: Advanced Applications
Once you’ve gotten a feel for the basics, you’ll start to see just how versatile your gravel vacuum system can be. This isn't just about digging holes. It's a precision tool for tackling tricky jobs where old-school methods are too slow, too messy, or just plain too risky. With the Hydrovac Attachment, you open up a whole new range of services that demand finesse and control.
Think about it—from clearing out stubborn drainage systems to carefully excavating around delicate structures, this setup lets you handle jobs that others might turn down. It's how you go from being just another contractor to the go-to expert for effective digging.
Unclogging Stubborn Drainage Pipes
We’ve all seen it: a French drain or corrugated pipe so packed with silt and debris that it’s completely useless. Sending a plumbing snake down there often just pushes the problem further in, and a high-pressure jet can compact the gunk into a solid plug. It’s a real headache for landscapers and property managers.
This is where your hydro vacuum system shines. Feed both the power washer wand and the wet vac hose into the pipe. The water jet breaks up the compacted mess, and the vacuum sucks the slurry right out. You’re not just moving the blockage; you’re physically removing it from the system. It's a night-and-day difference in effectiveness.
The real trick is finding the right balance. You need enough water pressure to bust up the clog, but not so much that you blow out older, more brittle pipes. I always start with a lower PSI and ease it up until I see results.
Delicate Digging Around Tree Roots and Foundations
Working near mature trees or foundations is nerve-wracking. One wrong move with a shovel or an auger can sever a major tree root, causing irreversible damage. The same goes for digging next to a foundation, where heavy equipment can easily compromise the structure.
A hydro vacuum offers a much smarter, non-destructive approach. You can use the water to gently wash away soil from around sensitive tree roots without a single cut or tear. It’s a game-changer for arborists doing root inspections or for landscapers trying to run irrigation lines through an established garden.
The same logic applies when you need to expose a foundation for waterproofing or repairs. It’s like performing surgery, removing soil with absolute precision and zero risk of impact damage.
- Patience is Key: This isn't a race. Work methodically, peeling back soil layer by layer.
- Talk it Out: If you're running a two-person crew, constant communication between the wand operator and the vacuum manager is crucial for coordinating water and suction.
- Control the Slurry: In these sensitive spots, the goal is to keep things as clean as possible. Use just enough water to liquefy the soil and have the vacuum pull it out immediately. No one wants a giant mud pit next to their house.
This kind of control shows why the Hydrovac Attachment becomes an essential piece of kit for anyone who takes pride in doing the job right and avoiding costly mistakes.
This shift toward precision isn’t just a hunch; the numbers back it up. The global vacuum cleaner market is already valued at USD 54.33 billion, and the commercial side is booming. A full 80% of contractors are looking for cleaner, more efficient ways to work.
When you prime the suction zone with water pressure around 2000 PSI, you can pull debris from the tightest spots, avoiding the visibility issues that plague 65% of traditional digs. In fact, 75% of utility teams in key markets report potholing up to 50% faster after switching to a precise vacuum system like this. You can dig deeper into these vacuum technology trends and statistics if you're interested.
At the end of the day, mastering these advanced techniques is about more than just having a cool tool. It saves you time, cuts down on labor, and leaves you with a clean, professional job site that tells your clients you’re a true expert.
Keeping Your Gear in Fighting Shape
Your tools are your livelihood. Keeping them in top condition isn't just about making them last longer—it's about knowing they'll work reliably when you're out on a job. A well-maintained hydro vacuum system performs predictably, saving you from the kind of surprise breakdown that grinds a whole day to a halt.
Think of it this way: a few minutes of care after each job can head off 90% of the common problems crews run into. It’s no different than a painter cleaning their brushes. If you let gunk build up, your tools become useless. Same deal here.
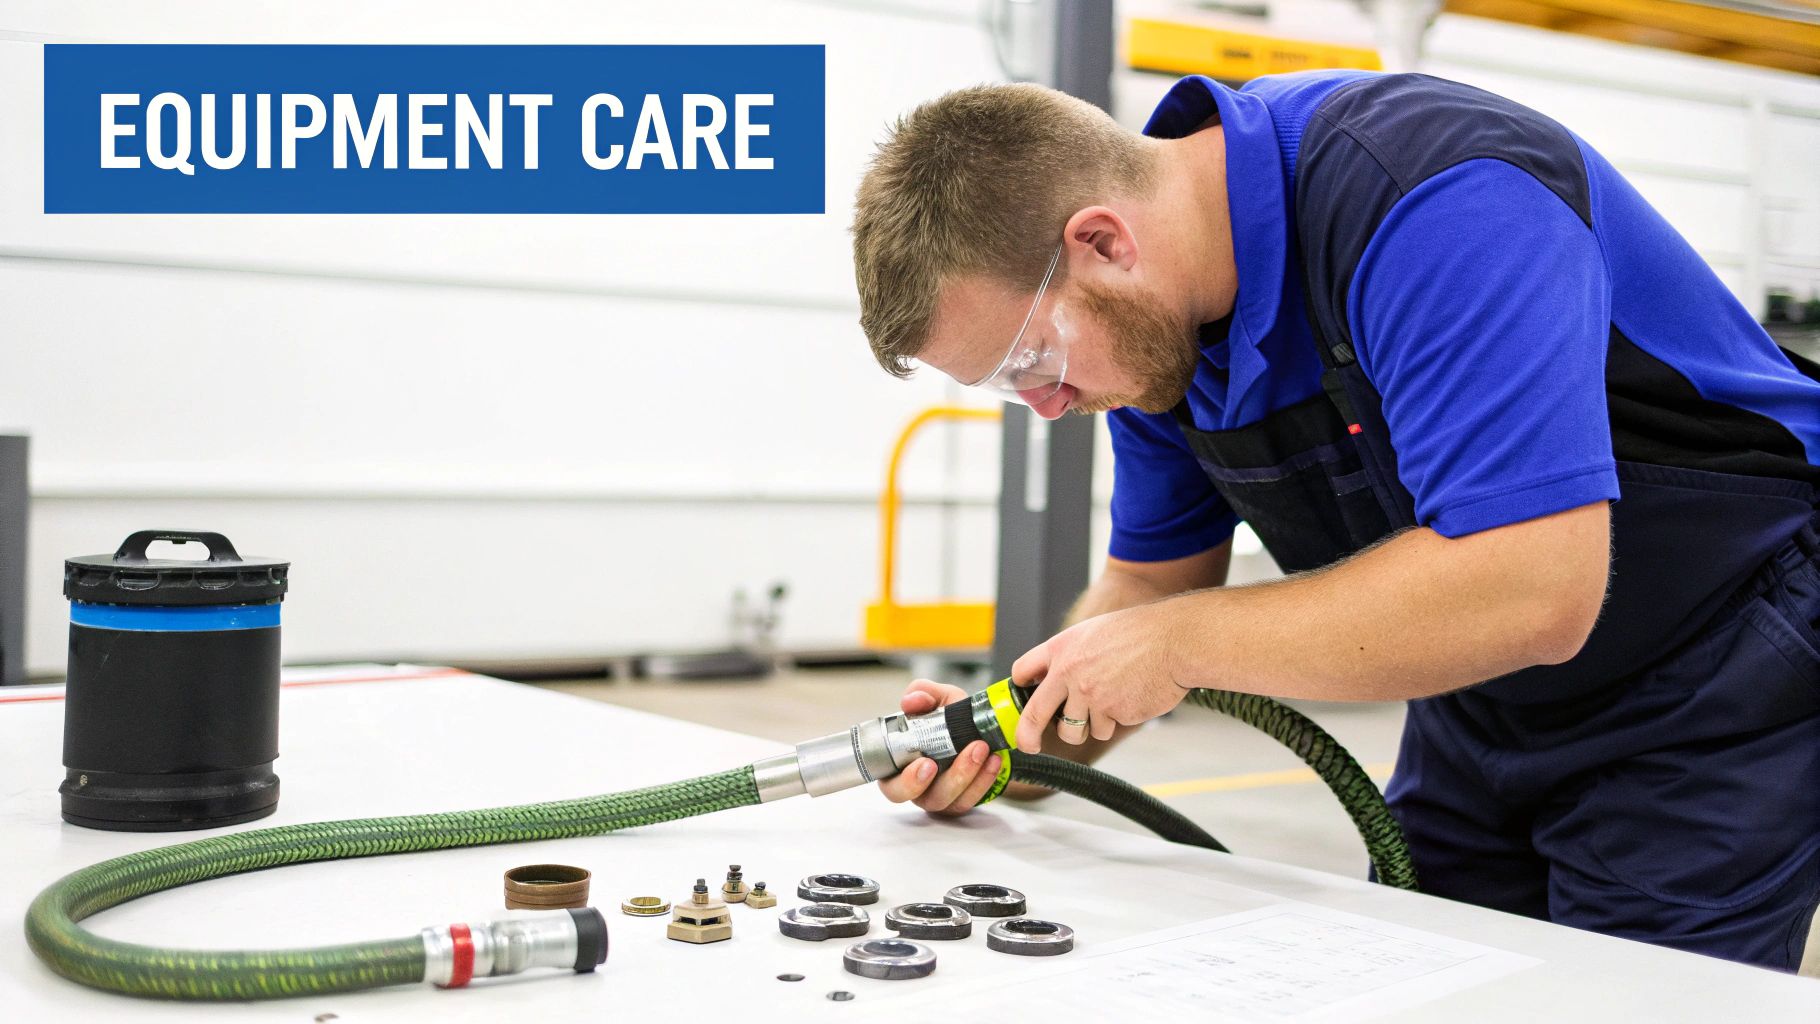
End-of-Day Cleanup and Inspection
After a tough job, especially one with a lot of heavy clay or rocky soil, a good cleaning is non-negotiable. Debris left inside the system can turn to concrete overnight, causing nasty blockages and even corrosion.
First thing you should do is flush the whole system. Just stick the end of your wet vac hose in a bucket of clean water and let it run for a minute. This quick flush pulls fresh water all the way through the hose and into the tank, washing out any leftover mud and gravel that’s just waiting to cause a clog on your next job.
With the system flushed, take a closer look at the key parts:
- The Hydrovac Attachment: Pop it off the hose and give it a solid rinse, inside and out. I’ve found that fine grit loves to hide around the nozzle cap, so pay extra attention there.
- Hoses and Connections: Give your vacuum and power washer hoses a quick walk-down. You're looking for any cracks, worn spots, or kinks that could cause a blowout or a sudden drop in performance.
- Filters and Tank: Dump and rinse the collection tank. Don’t forget to check your vacuum's filter—a clogged filter is the number one reason for weak suction.
A quick visual check is your best friend. Before I pack up, I always check the O-rings on my power washer connections and make sure the hose clamp on the Hydrovac Attachment is snug. It’s a 30-second habit that has saved me from frustrating leaks more times than I can count.
Troubleshooting on the Fly
Even with perfect maintenance, things happen. Knowing how to spot the cause of a problem quickly means you can fix it and get back to work instead of losing half your day. Luckily, most issues come down to just a few usual suspects.
When your gear isn't pulling its weight, here's a quick cheat sheet for what to look for.
| Problem | Likely Culprit | The Fix |
|---|---|---|
| Weak Suction | A clogged filter or a blockage in the hose is the most common cause. A loose hose clamp at the attachment can also break the seal. | Clean or swap the filter. Check for clogs. Make sure all connections are tight. |
| Poor Water Pressure | You've probably got a kinked hose, a clogged power washer nozzle, or the pressure is just set too low. | Straighten out the hose. Use a small pin or tool to clear the nozzle tip. Double-check your PSI settings. |
| Water Spraying Everywhere | Either the nozzle cap isn’t seated right on the wand tip, or you're running the pressure washer way too high for the job. | Reseat the cap to make sure it's secure. Dial back the PSI until the splashback is manageable. |
Building these simple habits into your routine—cleaning, inspecting, and knowing how to troubleshoot—ensures your gravel vacuum system is always ready to go. It’s a small price to pay for reliable, powerful equipment that won't let you down.
Common Questions from the Field
We get a lot of questions from contractors, digging crews, and yard pros who are curious about how this gravel vacuum system works in the real world. Let's get straight to the point and answer the most common ones we hear.
What's the Right Gear to Pair with the Hydrovac Attachment?
You've got the attachment, but what about the vac and power washer? Getting this right is key.
For the wet/dry vacuum, you'll want a unit with at least 5 peak horsepower and a standard 2.5-inch diameter hose. Anything less and you'll struggle with the suction needed for heavy, wet soil and gravel. Go with this setup, and you'll avoid constant clogs.
When it comes to the power washer, aim for a machine that can deliver between 1500 and 3000 PSI. This is the sweet spot. It gives you enough muscle to blast through compacted dirt but keeps you in control, so you don't accidentally damage a utility line you're trying to expose.
Can It Really Handle Tough Ground Like Clay or Rocks?
Yes, it absolutely can. This is where the system really shines, especially in soil conditions that would make you regret bringing a shovel. The high-pressure water jet turns that dense, hard-packed clay into a slurry, making it easy for the vacuum to suck it right up.
Got rocky soil? No problem. The Hydrovac Attachment lets you get in there and dislodge smaller rocks, vacuuming them out as you go. For bigger ones, you can work precisely around them, clearing the soil away without a struggle. It gives you a surgical approach that you just can't get with traditional digging methods.
Think of it this way: you're not fighting the ground anymore. You're using water to change its state from a solid to a liquid. It's a game-changer for making excavation faster and saving your back, especially on those tough residential jobs.
How Does It Keep the Job Site from Turning into a Mud Pit?
Cleanliness is where the patented design really pays off. The Hydrovac Attachment is built to contain the mess right at the source, which is a lifesaver on residential properties where a client is watching your every move.
Here's a breakdown of how it stays so clean:
- The nozzle cap focuses the water jet straight down into the ground. No wild overspray.
- As the soil is liquefied, the vacuum hose is right there, instantly sucking up the mud and water.
- This all happens at the same time, so there’s virtually no chance for splashing.
This means you spend your time digging, not cleaning up a massive muddy disaster. It's a smarter, more professional way to work. While this system isn't designed for massive hydrovac trucks, it’s the perfect mobile solution that connects right to your wet vac hose for precision work.
Ready to stop making messes and start digging smarter? The Hydrovac Attachment turns the wet vac and power washer you already own into a powerful, precise excavation tool. See how it works and grab yours at Hydrovac Attachment.