

Before you even think about moving dirt, laying the groundwork for your fence is the most important part of the job. A solid plan is what makes the difference between a fence that stands strong for decades and one that starts leaning after the first big storm. It all starts with a proper layout, a call to 811, and a good look at the ground you're working with—challenges that the hydrovac industry is uniquely equipped to handle.
Your Blueprint for a Flawless Fence Line
A successful fencing project lives and dies by its planning phase. Think of this as creating the blueprint for your build—it's not just about marking a line in the grass, it’s about establishing the foundation for the entire structure.
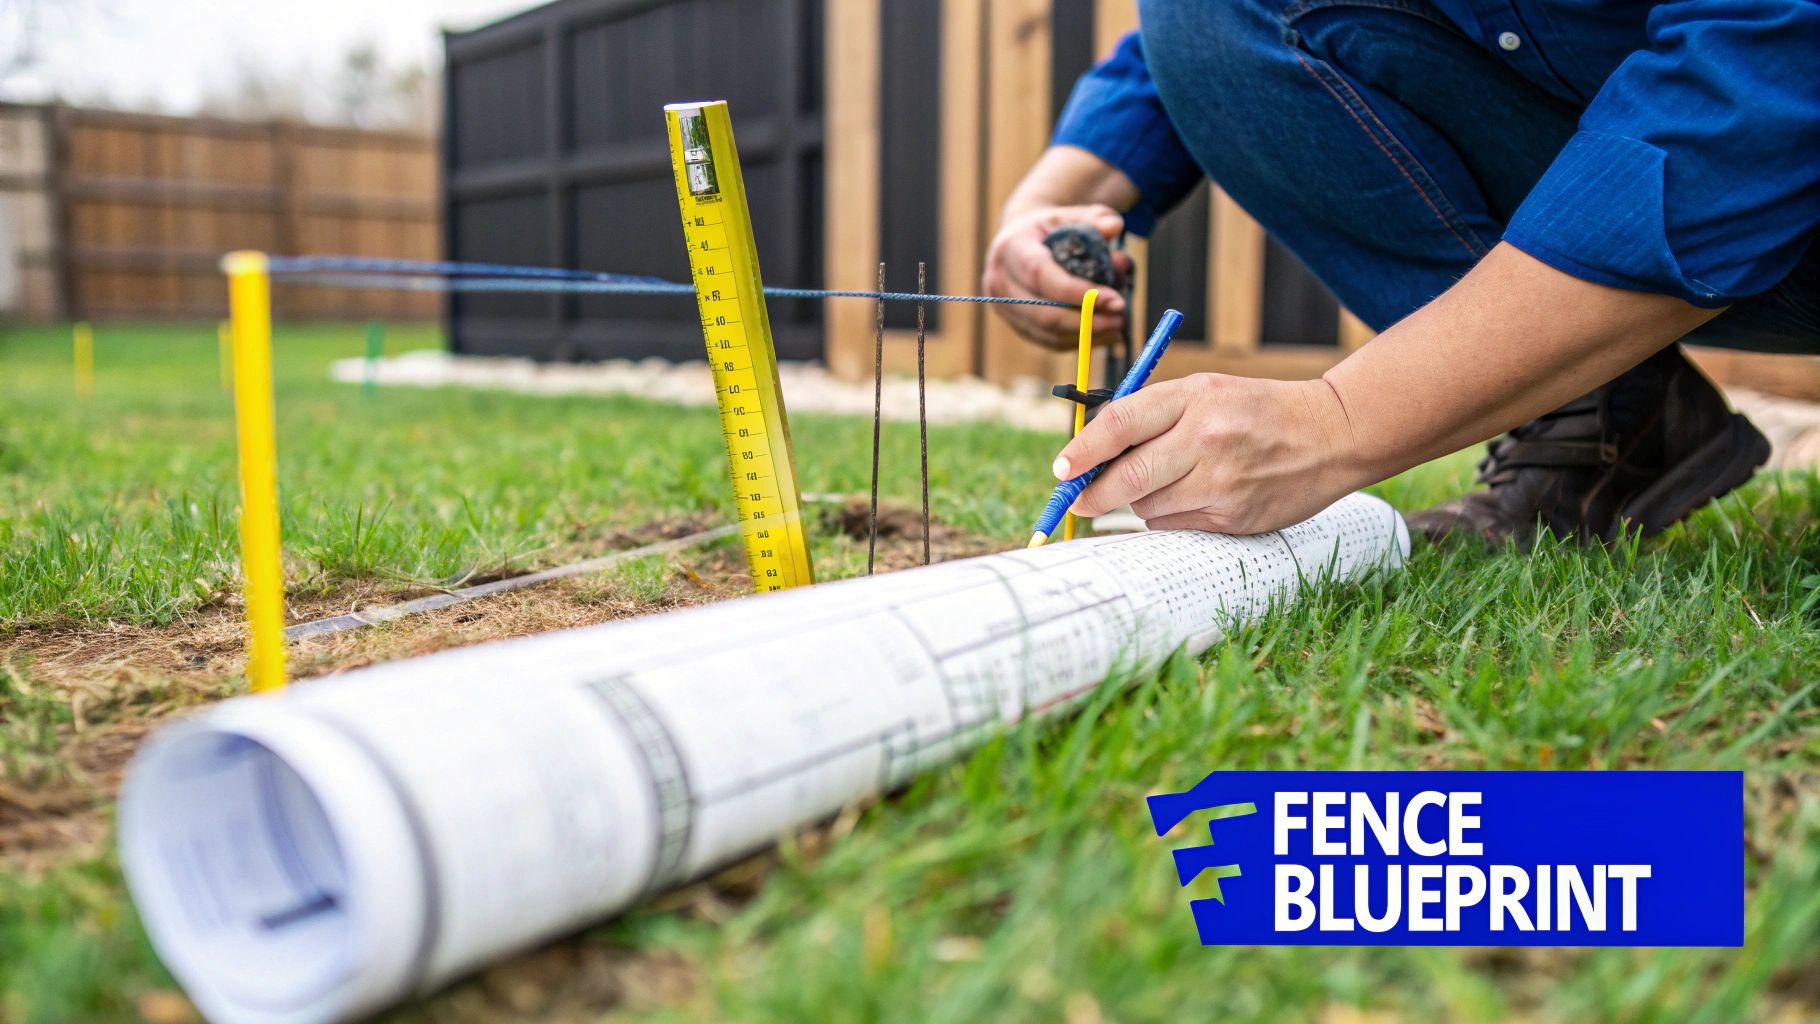
Your first move is to map out the perimeter. I always recommend using batter boards and a mason's string to pull a tight, straight guide for your fence line. This old-school technique is still the best way to get perfectly square corners and ruler-straight runs, giving you that professional finish everyone wants.
Navigating Regulations and Hidden Dangers
Once you have your layout, there are two things you absolutely cannot skip: checking local building codes and locating underground utilities. Many towns and cities have specific rules about fence height, how far you need to be from the property line, and even how deep your post holes have to be. A quick call to your local planning department can save you a world of headache and the potential of having to tear it all down.
The single most critical safety step is calling 811 before you dig. This is a free, nationwide service that sends local utility companies out to mark their underground lines—gas, water, electric, you name it. Hitting one of these isn't just dangerous; it can lead to massive fines and repair bills.
After the utilities are marked, you have to dig with extreme care inside the "tolerance zone," which is typically 18-24 inches on either side of the paint or flags. Safely exposing these lines is a delicate process known as potholing. If you're new to this, it’s worth understanding the technique. You can get a deeper dive into this crucial safety measure by reading our guide on what is potholing in construction.
Understanding Your Soil's Story
Finally, get to know your soil. Take a small shovel and see what you're up against. Is it soft and loamy? Is it dense, heavy clay? Or is it full of rocks and debris? The type of soil you have will dictate the best digging method and the right equipment for the job.
It’s no surprise that equipment trends follow soil and climate patterns. For example, market reports show the hydrovac industry expanding rapidly in areas with dense infrastructure and challenging soil conditions. Traditional methods like augers struggle here, creating a significant demand for safer, more precise excavation solutions. This kind of industry insight helps you choose the right tool, whether it's a simple manual post-hole digger or a more advanced piece of equipment like our Hydrovac Attachment Tool.
Choosing the Right Tool for the Job
The tool you pick to dig fence post holes will make or break your project's efficiency, safety, and ultimately, your profit. Every job site throws something different at you—from soft, easy-to-dig loam to ground that’s rock-hard or hiding a web of utilities. The first real step to a smooth fencing job is matching your digging method to the ground conditions you're facing.
For a handful of posts on a small backyard job with forgiving soil, you might get by with a manual post-hole digger. It's cheap, simple, and you have total control. But let's be honest, it's back-breaking work and becomes a non-starter for larger projects or tough ground.
Augers and Their Limitations
A gas-powered auger is a massive leap forward in speed. You can drill dozens of holes in the time it takes to dig a few by hand, which is why it’s a favorite for many fencing crews working in wide-open, clear ground.
But that power comes with some serious strings attached. The second an auger bit catches a big rock or a stubborn tree root, it can kick back with violent force. I've seen it happen, and it’s a recipe for injury. That sudden jolt isn't just dangerous for the operator; it can also shred the auger's gearbox, leading to expensive repairs and lost time on the job.
When you're working anywhere near marked utilities, a mechanical auger is a high-stakes gamble. It's illegal to use one within the 18-inch tolerance zone of a marked line. They can chew through pipes and cables in an instant, creating a dangerous mess and leaving you liable for some hefty fines.
The Modern Approach: Hydro Excavation
This is where hydro excavation completely changes the game. A hydrovac system uses high-pressure water to turn soil into a liquid slurry, then a powerful vacuum sucks it all away. The result is a perfectly clean, precise hole with almost zero disturbance to the surrounding area. It's simply the safest, most effective way to dig in sensitive spots.
For contractors who need this capability without buying a massive hydrovac truck, The Hydrovac Attachment Tool is the perfect solution. It cleverly turns two pieces of equipment you probably already own—a power washer and a wet vac—into a legitimate vacuum excavation system. This makes it an invaluable tool for digging fence posts in a few common scenarios:
- Utility-Heavy Areas: You can safely dig right up to and around marked lines without the risk of a catastrophic strike.
- Challenging Soil Conditions: It makes short work of rocky, debris-filled soil that would bring an auger to a grinding halt.
- Established Landscapes: It allows you to dig with surgical precision, protecting delicate sprinkler lines and preserving pristine lawns.
Integrating a tool like The Hydrovac Attachment Tool into your operation means you can confidently take on those tricky jobs other contractors have to pass on. It’s a safer, more efficient way to dig that shows your clients you're a professional who's serious about doing the job right.
Comparing Fence Post Hole Digging Methods
Choosing the right digging method is a critical decision that balances speed, cost, and safety against the specific challenges of your job site. This table breaks down the most common tools to help you decide which one best fits your project's needs.
| Method | Best For | Average Time Per Hole | Safety Concerns | Cost |
|---|---|---|---|---|
| Manual Digger | Small jobs (<10 posts) in soft, rock-free soil. | 15-30 minutes | High physical strain; repetitive motion injuries. | $ (Low) |
| Gas Auger | Large jobs in clear, unobstructed soil with no utilities. | 2-5 minutes | High risk of kickback; potential for severe utility damage. | $$ (Moderate) |
| Hydrovac Attachment | Any soil type, especially around utilities or in established landscapes. | 5-10 minutes | Low physical risk; requires water source and proper PPE. | $$$ (Moderate to High) |
Ultimately, while augers offer unmatched speed in ideal conditions, the safety and precision of hydro excavation make it a superior choice for the complex and unpredictable environments that are common in professional fencing.
How to Dig a Perfect Post Hole Every Time
Alright, you've got your plan laid out and your gear is ready to go. Now for the real work: digging the holes. Getting this part right is less about brute force and more about smart technique. The stability of your entire fence depends on a solid foundation that can handle whatever the weather throws at it.
The first rule of thumb every pro follows is the 'one-third rule'. It's simple: at least one-third of your fence post needs to be in the ground. So, for a typical 6-foot tall fence, you'll be using 8-foot posts and digging your holes anywhere from 24 to 30 inches deep.
Mastering Depth and Alignment
That one-third rule gives the post enough leverage in the ground to stand firm against wind and pressure. But if you're in a colder climate, you have to think about the frost line. You absolutely must dig below it—which could mean going down 36 inches or even deeper in some northern areas. If you don't, winter frost heave will slowly push your posts right out of the ground.
The secret to a fence that looks sharp and professional is keeping every single hole perfectly plumb, meaning vertically straight. A post-hole level is your best friend here. I can't stress this enough: check your alignment constantly as you dig. Make sure the sides are straight down, not sloped, or your posts will start to lean the second you set them.
This little infographic shows just how far we've come from the old days of digging by hand.
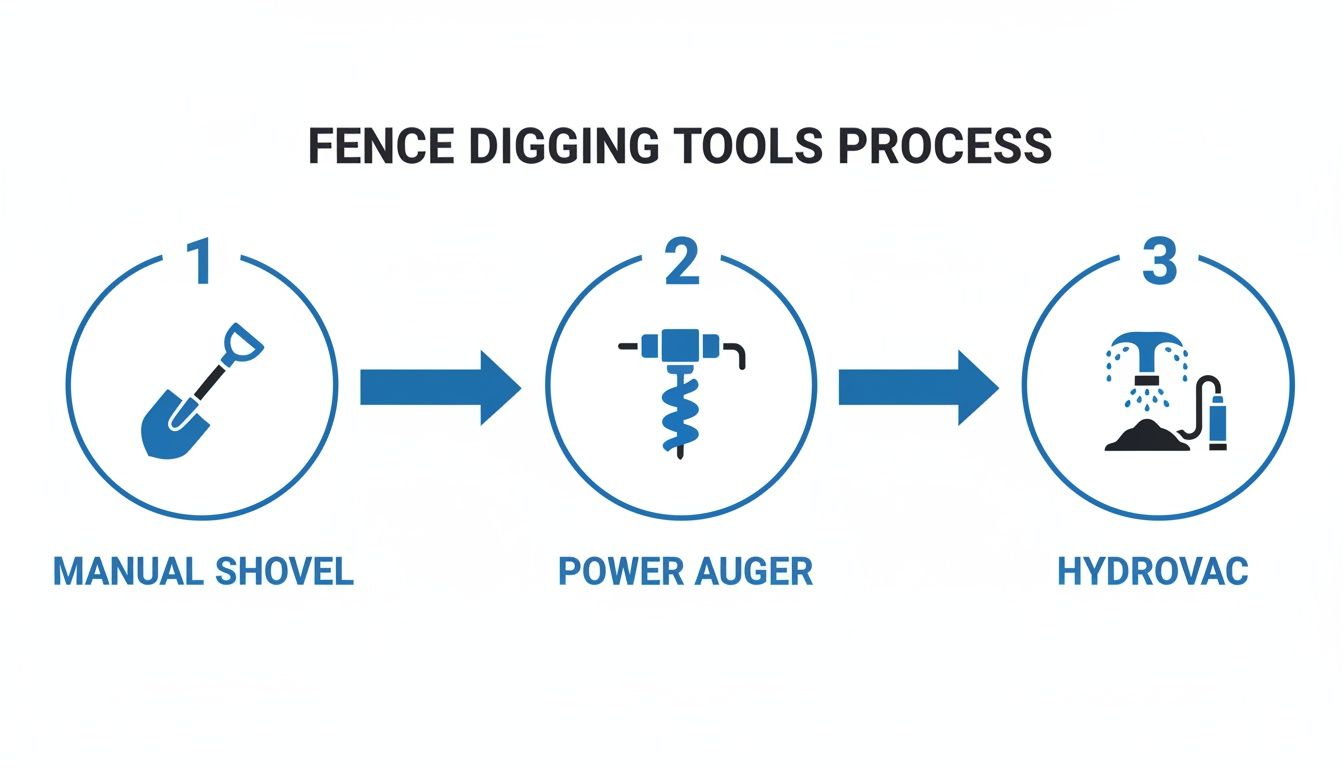
You can see the clear progression from back-breaking manual tools to much safer and more precise methods, like hydrovac systems, that are a lifesaver on tough job sites.
Tackling On-Site Headaches
Let's be honest, no job site is a perfect, soft patch of dirt. You're going to hit something—dense clay, a stubborn tree root, or a buried rock. This is where your choice of equipment really starts to matter. An auger can get you into a world of trouble with these obstacles, but this is exactly where hydro excavation shines.
I’ve seen it happen a hundred times. You hit a big root or a chunk of old concrete, and the auger either kicks back hard or just grinds to a halt. That’s a classic bottleneck that wastes time and money.
A system like The Hydrovac Attachment Tool completely changes the game. It uses pressurized water to carefully break up that compacted soil or dislodge whatever's in the way, all without the dangerous kickback of a mechanical auger. Then, the vacuum just sucks all the debris out, leaving you with a clean hole right where you planned it.
This non-destructive approach is a huge advantage when you're dealing with:
- Dense Clay: It turns heavy, sticky soil that would jam up an auger into a manageable slurry.
- Root Systems: You can slice through fibrous roots without tearing up the entire root ball of a tree you want to keep.
- Rocky Ground: It lets you safely work around and remove rocks without the risk of an auger blade catching and kicking back.
By getting these fundamentals down and picking the right tool for the challenges you'll actually face, you’re not just digging holes. You're building a fence with a rock-solid foundation that will last for years.
The Hydrovac Advantage in Fencing Projects
For contractors ready to move past the old-school limitations of augers and post-hole diggers, hydro excavation is the next logical step. This isn't just a different way to dig fence post holes; it's a complete shift in strategy that gives you a serious leg up on the competition. It turns what could be a high-risk, messy job into a controlled and efficient operation.
The technique itself is brilliantly simple. High-pressure water liquefies the soil into a slurry, and a powerful vacuum immediately sucks it away. What you’re left with is a perfectly clean, precise hole with almost no disturbance to the surrounding ground. Forget about dangerous auger kickback, shredded utility lines, and ruined landscaping.
Transforming Your Operations with a Single Tool
The real magic here is that you don't need a massive, dedicated truck to get this done. The Hydrovac Attachment Tool is designed to bridge that gap, turning a standard pressure washer and a wet vac—gear most crews already have on the trailer—into a powerful and portable hydro excavation unit. It’s built for the real world, letting your team work with surgical precision, even in tight or tricky spots.
Think about a typical commercial job, like putting up a security fence around an office building. The grounds are always a spiderweb of buried utilities—power, water, fiber optic lines, you name it. Bringing a mechanical auger in there is just asking for trouble. One wrong move and you’ve caused an outage that costs thousands to fix and kills your reputation.
This is where the Hydrovac Attachment Tool shines. Your crew can safely daylight and dig around every single line. This isn't just about preventing a catastrophe; it's about building trust. When clients see you taking that level of care, they know they hired a true professional.
Using a non-destructive digging method completely takes the risk of a utility strike off the table. Those strikes can come with fines and repair bills that wipe out the profit on an entire project. Suddenly, hydro excavation isn't a luxury—it's essential risk management.
Conquering Problematic Soil Conditions
Hydro excavation also makes you look like a hero in soil conditions that would stop a mechanical auger dead in its tracks. As any fencing contractor knows, you rarely get to work in perfect, loamy soil.
Here’s where a hydrovac system really earns its keep:
- Rocky or Debris-Filled Ground: Instead of fighting with rocks and jarring your equipment, the pressurized water just loosens the soil around them. The vacuum pulls them right out.
- Dense Clay: That heavy, sticky clay that clogs up an auger bit? It’s no match for hydro excavation. The water turns it into a manageable slurry that’s easily removed.
- Intricate Root Systems: You can carefully cut through small roots without tearing up the main root ball of a mature tree, keeping valuable landscaping intact and the property owner happy.
This kind of operational flexibility means you can bid confidently on jobs that other contractors have to pass on. If you want to dive deeper into the process, check out our guide on what is vacuum excavation. Adding this tool to your arsenal lets you deliver better results, make your job sites safer, and ultimately land the bigger, more profitable contracts by solving problems your competitors simply can't handle.
Setting Posts for Maximum Strength and Longevity
A perfectly dug hole is only half the battle. The real test of a fence’s strength comes from how you set the posts. This final step is what locks everything in place, ensuring your fence can stand up to high winds, shifting ground, and the simple passage of time.
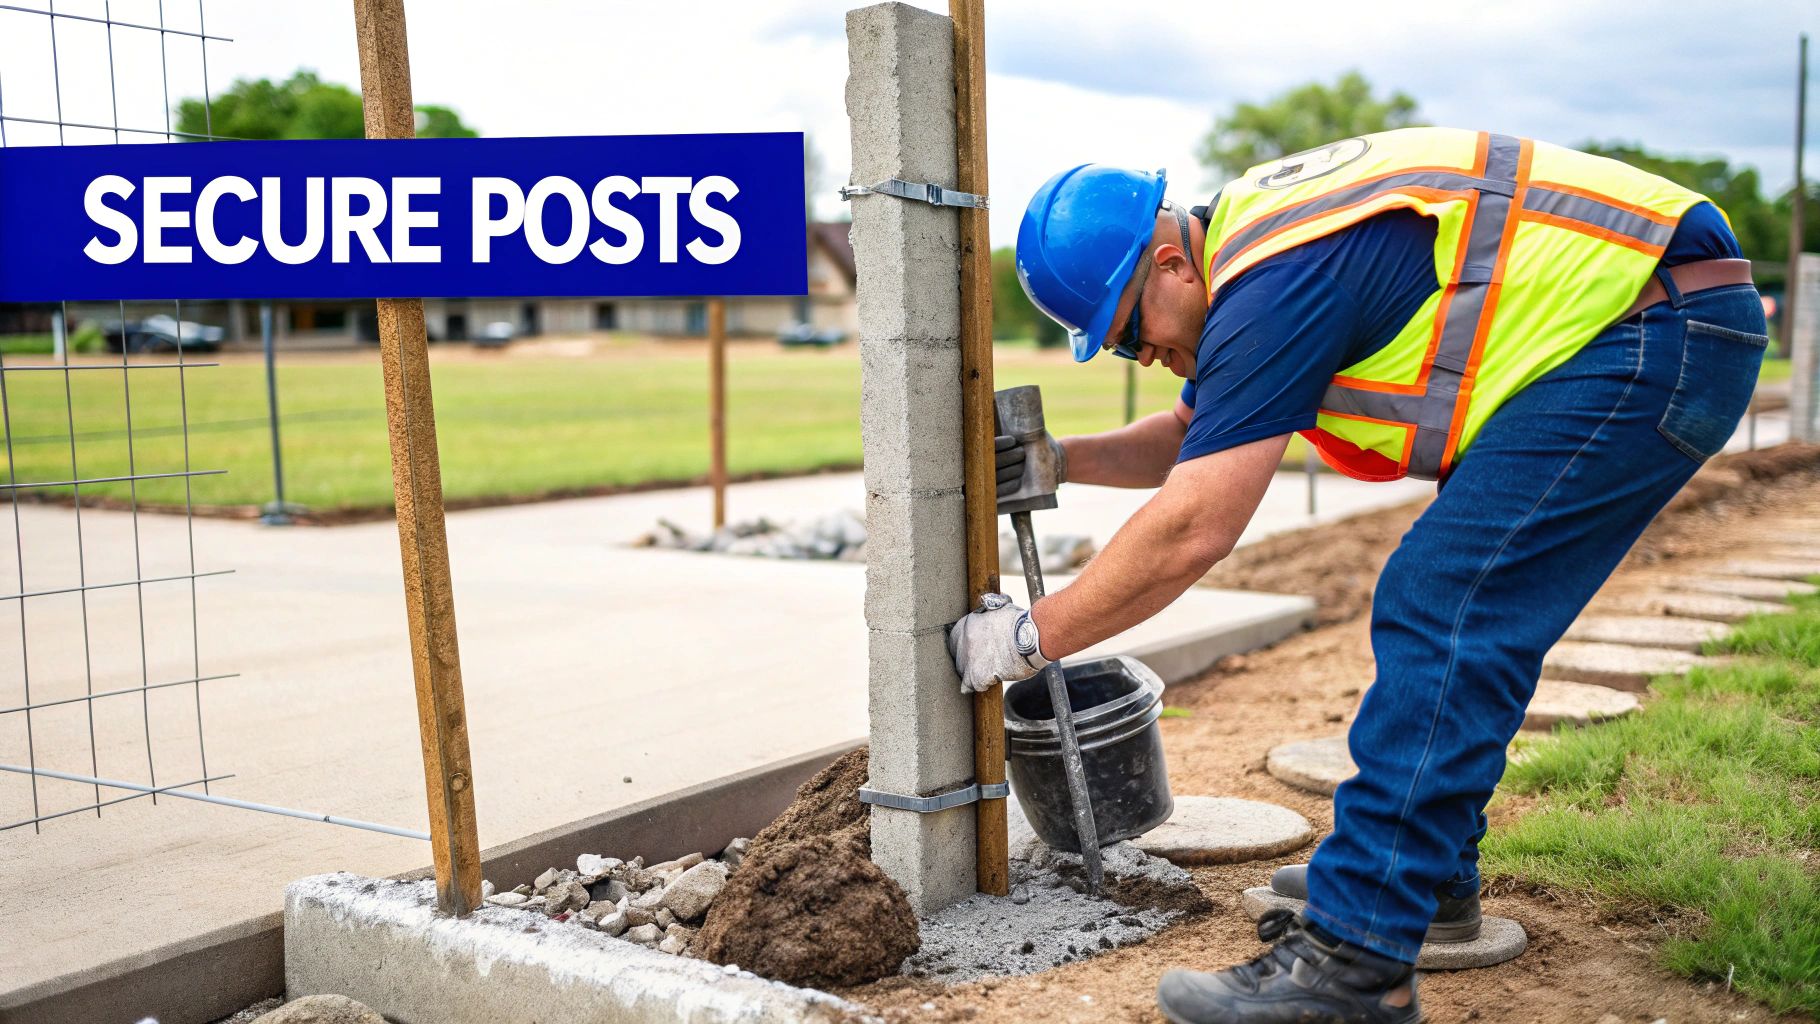
The first big decision you'll make is what to backfill the hole with. For many fences, compacted gravel is a solid choice. It provides fantastic drainage, which is the number one defense against wood posts rotting out at the base. But when it comes to the real workhorse posts, nothing beats the uncompromising stability of concrete.
Gravel vs. Concrete: When to Use Each
Knowing when to use gravel and when to spring for concrete is the key to building a smart, durable fence that doesn't break the bank. Each material has its place.
- Compacted Gravel: This is your go-to for standard line posts, especially in soil that already drains fairly well. I always add a few inches of gravel to the bottom of every hole, even the ones getting concrete. It creates a path for water to drain away from the post's vulnerable base.
- Concrete: This is non-negotiable for corner posts, end posts, and most importantly, gate posts. These are the high-stress points that bear the most tension and weight. Concrete provides a solid anchor that stops them from sagging, leaning, or shifting over the years.
Think about a gate post for a second. The constant swinging and leverage it endures is immense. A solid concrete footing is the only way to ensure that gate stays perfectly aligned and swings freely for the life of the fence.
A common mistake is thinking every single post needs to be set in concrete. While it's incredibly strong, it’s the strategic use of concrete on structural posts that gives you the best bang for your buck. For most residential fences, using concrete only on the terminal posts is a professional and highly effective approach.
Mixing and Pouring for a Rock-Solid Foundation
When it's time for concrete, doing it right is everything. Whether you're mixing bags in a wheelbarrow or have a portable mixer on site, you're shooting for a consistent, peanut-butter-like texture. If it's too wet, the concrete will be weak. Too dry, and it won't flow properly to fill all the gaps around the post.
Before you pour a single drop, get that post perfectly plumb. Use some scrap 2x4s as braces, staked into the ground to hold the post steady. Check it with a level on two adjacent sides to make sure it's dead-on straight.
Now you can pour the concrete around the post, using a stick or piece of rebar to poke around and eliminate any air pockets. Finish the job by sloping the very top surface of the concrete away from the post, creating a little "collar." This simple detail is huge—it makes rainwater run off instead of pooling against the wood, which is a major cause of premature rot.
Figuring out exactly how much concrete to buy can be tricky, but getting it right saves you time and money. If you need some help with the math, check out our guide on how much Quikrete you might need for your specific project.
Common Questions About Digging Fence Post Holes
Even if you've been setting fences for years, every new job seems to throw a curveball. You might hit a surprise layer of clay, or the local code has some weird quirk you weren't expecting. Let's walk through some of the questions that come up time and time again when you're out in the field.
Getting the post depth right is probably the most common one, and for good reason. Your fence is only as solid as the holes you dig for it.
How Deep Should My Fence Post Holes Be?
The old rule of thumb is to bury one-third of the post. So, for a standard 6-foot fence using 8-foot posts, you’re looking at a hole depth somewhere between 24 and 30 inches.
But here's the real kicker: the local frost line. In colder parts of the country, you have to dig below it, or the winter freeze-thaw cycle will literally pop your posts right out of the ground. This could mean going down 36 inches or even deeper. Before you fire up the auger, always double-check the local building codes. It'll save you a world of headaches later.
What Is the Best Way to Handle Rocky Soil?
Rocky soil is where augers go to die. Hitting a big rock can send a dangerous kickback up the machine, break a shear pin, or just stop your entire day cold. You can try to fight it with a digging bar, but on a professional job, that's just not a realistic way to spend your time.
This is exactly why hydro excavation has become such a game-changer. A tool like The Hydrovac Attachment uses high-pressure water to blast the soil into a slurry, freeing up rocks of any size. Then, the vacuum simply sucks it all out—rocks, mud, and all. It completely takes the risk of mechanical damage and operator injury off the table.
Any seasoned pro will tell you that trying to strong-arm an auger through a rock field is a fool's errand. Hydro excavation isn't just a clever trick; it's the right tool for the job. It turns what used to be a project-killer into a minor delay, keeping your crew safe and your timeline intact.
Is Concrete Always Necessary for Fence Posts?
Not for every single post, but you absolutely need it where it counts. Corner posts, end posts, and especially gate posts are non-negotiable—they need a solid concrete anchor. These are the structural backbone of the fence, and they take all the tension and weight. Without concrete, they’ll sag and shift, and your fence will look terrible in a year.
For the regular line posts in the middle, you can sometimes get away with compacted gravel, especially if you're working with dense, well-draining soil. The gravel actually helps with drainage and can prevent the post base from rotting out. That said, if the fence is in a high-wind area or you know it's going to take a beating, stick with concrete for maximum stability.
What Is the Standard Spacing for Fence Posts?
For most fences—wood, vinyl, or chain-link—the go-to spacing is 8 feet on center. That means you measure from the dead center of one post to the center of the next. This distance hits the sweet spot between structural stability and material cost, which is why you see it on almost every residential and commercial job.
Now, if you're building in a particularly windy location or using really heavy fencing materials, tightening that spacing up to 6 feet on center will add a ton of extra strength. Just remember to always measure from the center point so your panels and rails line up perfectly.
Stop fighting with stubborn soil and hidden utilities. The Hydrovac Attachment turns your existing equipment into a precision digging machine, allowing you to dig fence post holes faster, safer, and more efficiently. Visit the Hydrovac Attachment website to see how it can upgrade your operation.